Friday, December 30, 2011

Reset Waste Ink Canon IP1500

http://www.inkjet-laser.com/wp-content/uploads/2009/06/canon_pixma_ip1500.jpgStep 1 Manual for Service mode to reset waste ink or blinking canon ip1500

1. Unplug power and USB.
2. Open door and hold power button.
3. Connect power.
4. Close door, then release power button.

Step 2 Use software for Permanent to reset waste ink, read here step by step and tool to reset permanent waste ink.
Continue Reading..

Manual For EPSON EPL-5600

http://www.tonercartridgedepot.com/images/sp/epson-epl-5600.jpgThis service manual describes functions, theory of electrical and mechanical operations, maintenance, and repair of EPL-5600 /ActionLaser 1600. The instructions and procedures included herein are intended for the experience repair technician, and attention should be given to the precautions on the preceding page. The chapters are organized as follows:

CHAPTER 1. GENERAL DESCRIPTION
Provides a general product overview, lists specifications and illustrates the main components of the printer.

CHAPTER 2. OPERATING PRINCIPLES
Describes rhe theory of printer operation.

CHAPTER 3. DISASSEMBLY AND ASSEMBLY
Includes a step-by-step guide for product disassembly and assembly.

CHAPTER 4. ADJUSTMENTS
Includes a step-by-step guide for adjustment.

CHAPTER 5. TROUBLESHOOTING
Provides Epson-approved techniques for adjustment.

CHAPTER 6. MAINTENANCE
Describes preventive maintenance techniques and lists lubricants and adhesives required to service the equipment.

APPENDIX
Describes connector pin assignments circuit diagmrm circuit board component layout and exploded diagram.
download
http://rapidshare.com/files/135564446/Epson_EPL-5600_Service_Manual.rar
Continue Reading..

Thursday, December 29, 2011

Reset printer canon ip4200

http://www.comparestoreprices.co.uk/images/ca/canon-ip4200.jpgHow to reset waste ink / blinking printer canon ip4200

With the printer power turned off, while pressing the Resume/Cancel button, press and hold the Power button. (DO NOT release the buttons. The Power LED lights in green to indicate that a function is selectable.)

While holding the Power button, release theresume/Cancel button. (DO NOT release the Power
button.)

While holding the Power button, press the Resume/Cancel button 2 times, and then release both
the Power and Resume/Cancel buttons. (Each time the Resume/Cancel button is pressed, the Alarm and Power LEDs light alternately, Alarm in orange and Power in green, starting with Alarm LED.)

When the Power LED lights in green, press the Resume/Cancel button the specified number of
time(s) setting).

Time(s) LED indication Function Remarks 0 times Green (Power) Power off When the print head is not installed, the carriage returns and locks in the home position capped.
1 time Orange (Alarm) Service test print .
2 times Green (Power) EEPROM information print
3 times Orange (Alarm) EEPROM initialization
4 times Green (Power) Waste ink counter resetting
5 times Orange (Alarm) Destination settings After entering the destination settings mode, press the Resume/Cancel button the specified number of time(s) to select the destination. For detail, see "Destination settings procedures" below.
6 times Green (Power) Print head deep cleaning (Cleaning of both black and color)
7 times Orange (Alarm) Reserved
8 times Green (Power) CD / DVD check pattern
9 times Orange (Alarm) CD / DVD print position
correction (horizontal: X direction)
10 times Green (Power) CD / DVD print position
correction (vertical: Y direction)
11 to 13 times Orange, Green, Orange(Alarm,
Power,Alarm) Return to the menu selection
14 times Green (Power) Left margin correction Not used in servicing.
15 times Orange (Alarm) Return to the menu selection


Time(s) LED indication Destination CD / DVD print
0 times Green (Power) No change of the destination
1 time Orange (Alarm) Japan Supported
2 times Green (Power) Korea Not supported
3 times Orange (Alarm) US Not supported
4 times Green (Power) Europe Supported
5 times Orange (Alarm) Australia Supported
Continue Reading..

The Stylus Photo 2200

The Stylus® Photo 2200 is the ideal printer for those absent the aforementioned constancy in their agenda prints as accepted blur prints. We all adulation the abrupt colors and low costs of our inkjet printers but the absolute accuracy is that those prints just aren't traveling to endure as continued as "real photos." Epson's acknowledgment is the Stylus Photo 2200 with the new, seven-color UltraChrome pigment-based archival inks. (At the time of this analysis Epson is the alone architect to action bistered ink photo-quality printers.) Now you can accomplish the aforementioned blush range, body and assimilation of dye-based inks and get above achromatize resistance. Blush prints fabricated on Epson Watercolor Cardboard are ablaze fast up to 80 years and up to 44 years on Premium Luster.

The Stylus Photo 2200 is an accomplished best for austere abecedarian or able photographers and is affordably priced at $699 ($200 beneath than the 2000P.) The Stylus Photo 2200 with UltraChrome ink has faster press and dehydration times enabling the printer to accomplish a book acceleration of four account for an 8" x 10" photograph on bright cardboard - that's three times faster than the Stylus Photo 2000P. Acceleration and connectivity is ensured with accelerated USB 2.0 and IEEE 1394 (FireWire) interfaces as able-bodied as a bi-directional IEEE 1284 alongside port.

The printer's resolution of up to 2880 x 1440 dpi comes from ultra baby 4-picoliter droplets, which produces an agnate dot admeasurement to a two-picoliter dye-based droplet. Epson's absolute Micro Piezo ink jet technology creates absurd detail, admirable derma tones and an ultra-wide blush ambit that is ideal for all types of photography. The changeable atramentous inks acquiesce users to accept amid the printer's accepted Photo Atramentous armament and an alternative Matte Atramentous cartridge. With a ample printable breadth it can handle from 4" x 6" up to 13" x 44" cut area affidavit with ease. It aswell appearance 4", 8.3" and 13" edge-to-edge borderless press on cycle paper. A cycle cardboard holder, an automated cutter accumulation and a book catcher bassinet is included.

A array of bright and matte affidavit are accordant with the Stylus Photo 2200, including Epson's Premium Semigloss Photo Paper, Premium Luster Photo Paper, Premium Bright Photo Paper, Watercolor Cardboard and Enhanced Matte (formerly called Archival Matte) Paper. The newest cardboard that is accessible is Epson's Velvet Fine Art paper. This new cardboard is a 100 percent cotton, acerbic chargeless cardboard and is accessible in both Letter and Super B (13" x 19") sheets. Thicker media is calmly accommodated by the chiral cardboard augment and its straight-through cardboard path.
The Stylus Photo 2200 includes EPSON Software Blur Factory with PRINT Image Matching support. PRINT Image Matching technology (P.I.M.), which Epson appear in February 2001, ensures that P.I.M.-enabled agenda cameras and P.I.M.-enabled printers plan altogether calm to actualize the best accessible prints. Included in the software array is a PIM book constituent for Photoshop 6, 7 and Photoshop Elements 1, 2.

Stylus Photo 2200 Features:

* New 7-Color UltraChrome™ archival inks in individual ink cartridges
* Improved matte quality with optional Matte Black ink cartridge
* 2880x1440 dpi resolution with ultra-fine 4-picoliter droplets
* Fast print times: 8x10" image: 2 min. 6 sec. on matte paper, 3 min. 51 sec. on semi-gloss paper
* Borderless photo printing: 4x6" 5x7" 8x10" 8.5x11" 13x19" and with roll paper
* Roll paper holder and automatic cutter assembly
* Epson PRINT Image Matching (PIM) technology ensures that digital cameras and Epson printers work together to produce the best possible prints
* USB 2.0, FireWire (IEEE 1394), and Parallel connectivity
* Light fastness rating of up to 80 years on Watercolor and other Fine Art papers. 44 years on Premium Luster, Glossy and Semigloss media are currently being evaluated by Wilhelm Imaging Research.
Continue Reading..

Wednesday, December 28, 2011

Lexmark P3120 PrinTrio error

I replaced an ink cartridge in my Lexmark P3120 PrinTrio and when I closed the printer door I heard a pop! Now I get the msg printer door open.

I know what has happened, there is a 1 inch long plastic rocker that popped off in side. It feel out when I was examining the unit. It doesn't appear to be damaged, it looks as if it just snaps back on. But the problem is. How do you open this printer up?

I went to Best Buy where I bought it in Feb. of 2004 and they won't even send it in for service. It prints really well and I don't want to drop another $150 on a new printer, because of a 5 cent part.

I need to know how do you get into this printer. So does anyone have a sevice manual?

Thanks.
Continue Reading..

Reset Waste Ink Canon i320 and i255

https://blogger.googleusercontent.com/img/b/R29vZ2xl/AVvXsEjgfvvDY186uV0kwZrK_TZHJ2B34nDFWeLqTcNI-swK37n28d-vI-BLQxLQE3gW-VzoOFoyIuoiL47Y0imZfXwjhCOVRoiSIEpiLJPpNn2viNi9JY0kXYGUvr9Y8V29mq2MxF2yz2_K1q8/s320/Canon+i320.jpgStep 1
Manual Temporary

1. Unplug power and USBOpen door and hold power buttonConnect power
2. Close door, then release power button.

or Step

1. Turn off the printer. And disconnect the printer cable
2. Press and hold the POWER button, turn on the printer
3. The indicator (L.E.D.) should be green
4. Press and release the RESUME button , the indicator (L.E.D.) should be orange
5. Press and release the RESUME button again, the indicator (L.E.D.) should be green
6. Release both buttons.

Step 2 Software for Permanant

1. Reconnect the printer cable.
2. Open General Tools software and select (USB PORT)
3. Choose (SET DESTINATION 1) And it should be reset.

Remark “After service mode Pls use software
Continue Reading..

Error Printer Spooler How to fix fix spoolsv.exe

Get rid of Printer Spooler error messages and fix spoolsv.exe service in one click so you can print again with this automated Fix Wizard. The program fixes all known modifications of Printer Spooler errors including "Spooler SubSystem App stopped working and was closed" and spoolsv.exe service infection and corruption and removes several kinds of viruses infecting print spooler, like spoolsv32.exe and spoolssv.exe.

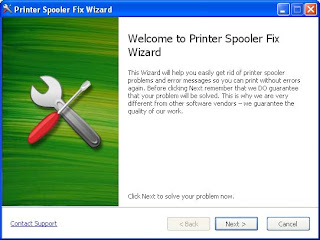
Printer Spooler Fix Wizard will solve your problem both in case it is caused by spyware or virus infection and in case it was caused by the consequence of corrupted registry settings or malfunction of some legitimate Windows components. Additionally, Live Support will help you in fixing Printer Spooler problems in difficult cases. Printer Spooler Fix Wizard is a simple to use application that can help you solve different service problems.
download printer spooler
Continue Reading..

How To Reset The print spooler in win XP SP2

Just Follow the simple step.
Here a guide for you Start>Run>type "services.msc" w/o quotes>Print Spooler Double Click on it, choose for startup type: "Automatic"
Continue Reading..

Print spooler service keeps stopping

Unassisted print spooler service not running error correcteing is near unlikely because it’s connected with Windows system and Windows registry transforms. Some errors in your registry are likely reasoned by a print spooler keeps stopping error. Print spooler service keeps stopping error and breakage can be a denouement of registry transgressions.

Print spooler service keeps stopping error is a wide spread matter and every consumer impacts it for this once. A precedence matter of print spooler service not running error fix up is a lot of possible failure causes. A likely print spooler keeps stopping error cause is malicious applications functioning.
Continue Reading..

How to Reset for HP deskjet 3650

One thing they did tell me that might help is how to print a test from the printer Ensure the printer is turned on.
* Press and hold the Power button.
* While holding the Power button, press and release the Resume button four (4) times.
* Release the Power button. A self-test page will print.
Continue Reading..

Sunday, December 25, 2011

fix for TN250 cartridge in an MFC 6800.

Anybody have a fix for TN250 cartridge in an MFC 6800.
Same problems with low toner light. Also out of toner caused shutdown. Managed to get it going again by cycling power on and off.
My problems have got worse after using after-market toner cartridges at ~$8 each but I can live with them (save $32 ).
Summary of my problems are
1 Toner shading intermittent. Sometimes gets worse as more copies are done. Sometimes starts bad and improves.
2 There is toner in cart and I would like to get low toner light off.
3 Occasional out of toner shutdown.

I have looked at the TN250, both brother and after-market, and see no window to cover!
Thanks for listening
Continue Reading..

Thursday, December 22, 2011

brother fuser replacement

Power off/on
- hold down button
- press again when drum light on
- worked for me on 1430 to to clear fuser error.
Continue Reading..

Monday, December 19, 2011

HP officejet k60

Below is HP definition for the the error code.
It seems consistent with your description.
252 Telephone line conditions were too poor to receive a fax.

Do The following:
1. Check the telephone line for noise by connecting a phone to it. Press one key on the keypad and listen. A working line should be essentially silent. If you hear cracking or hum on the line call for service. You didn't mention whether or not the problematic fax is coming from one phone number. If your line seems 'clean' then the problem may be with the senders phone line.
2. Unplug the power source for 30 seconds.
3. Use a known good phone cable
4. Make sure the phone cable is plugged in securely on both ends.
Continue Reading..

Sunday, December 18, 2011

RESET OKIDATA TONER DRUM

RESET OKIDATA TONER DRUM
1. Turn machine on while pushing and holding the TWO up/down menu buttons at same time.
2. Menu window will show "OKI USER"
3. Scroll to " Engine Dialog Mode" is indicated. Push Enter button.
4. "Diagnostic Mode xx.xx.xx S-Mode is indicated.
5. Scroll to "NV-Ram initial" is indicated. Push ENTER.
6. Window shows "NV-Ram- Initial Table 1".
7. Push ONLINE and ENTER Buttons simultaneously and HOLD for 10 seconds after you see "Executing Reset" appear in menu window.
8. Restart printer.

All toner, drum, fuser and transfer figures return to 100%.
Continue Reading..

Epson Stylus C82 Error

I have an epson stylus C82 that has been sitting for probably 2 years. I get a light greenish color when trying to print and when trying to clean the nozzles or head i get a blue and yellow check. No black or cyan color on the checks.

I also dont get any black, ive tried removing the cover case to see if it was the plastic tube but that is intact. Any help? I've done cleanings on it probably 4-5 times now maybe even more.

If any of you have suggestions that would be great. thanks in advance.
Continue Reading..

Saturday, December 17, 2011

Error hp 6110 carriage jam

My HP 6110 all in one is printing slanted prints and showing the error message open door and clear carriage jam. I've been through the HP help info to no avail. Is there anything I can do without taking it in for service?

The proper nomenclature is "encoder strip". It's a clear plastic strip with lines on it that runs through the back of the cartridge assembly and hooks on at either end of the printer. I use Window Cleaner on a paper towel as it works better than the 30% water solution that Chris recommended. Alcohol actually has little or no effect on ink.
Continue Reading..

Friday, December 16, 2011

Flashing EPSON 860 Error

This could be to old for those posting above but I had found these instructions back in 2004 and it worked for me when this happens to me on my epson 860:

1. turn off the machine for at least 5 minutes and disconnect the interface cable to the computer
2. push and hold down the "ink" button and the "paper" button and turn the printer on.
3. When the "paper" light flashes quickly release both the buttons and then immediately press and hold down the "ink" button only for at least 10 seconds.

You will need to try this several times to get the sequence correctly.
Continue Reading..

Thursday, December 15, 2011

hp designjet 750c plus errors

I just bought the hp design jet 750c plus used. I have installed the drivers and am able to see it in my printing options but when I try to print nothing happens. The plotter reads: ready, but nothing happens. I look in the printing que and it says printer error.

I am running windows vista and I am trying to print pdf and autocad files. I am using autocad LT 2008. I have tried saving my files in 2004 format but that doesnt work either. Any ideas for what i can do to make this work?
Continue Reading..

Wednesday, December 14, 2011

Canon i80 Waste Ink Tank Full

For Reset Canon i80 Waste Ink Tank Full

1) Close the print head cover, and turn off the printer. While pressing the Resume/Cancel button, press the Power button. (Do not release the buttons. The LED lights in green to indicate that a function is selectable.)

2) While holding the Power button, release the Resume/Cancel button. (Do not release the Power button.)

3) While holding the Power button, press the Resume/Cancel button three times, and then release the Power and Resume/Cancel buttons. (Each time the Resume/Cancel button is pressed, the LED lights alternately in either orange or green, starting with orange.) During initialization, the LED blinks in green.

4) When the LED stops blinking and lights in green, press the Resume/Cancel button the 4 times. (Each time the Resume/Cancel button is pressed, the LED lights alternately in either orange or green, starting with orange.)

5) Press the Power button. The LED lights in green, and the
selected function is performed. (When the operation completes, the printer returns to the menu selection mode automatically.)

6) Power off then back on and test.
Continue Reading..

Monday, December 12, 2011

Epson WorkForce 615 User Manual

Epson WorkForce 615 User ManualDownload autonomous Epson Manpower 615 Mortal Recitation.pdf This Epson Personnel 615 Someone Run contains the substance you require when start, falsehood, environs, configuring, maintenance and troubleshooting, operating manual the Epson Men 615. Printing Subject 4-color (CMYK) drop-on-demand MicroPiezo® ink jet application Ink Reach Chromatic, Magenta, Yellow and Dim Ink Pickup Configuration 4 cause ink cartridges Ink Identify DURABrite® Ultra oxide ink (blot, conclusion and h2o resistant) Deteriorate Action / Indication Longevity Up to 118 eld Minimum Ink Droplet Size 3 droplet sizes, as bitty as 2 picoliters Peak Publish Smuggled 38 ppm Colour 38 ppm Laser Wellborn Indication Speed† Person 15 ppm Impact 9.3 ppm Peak Double Speed† Sinister 38 cpm Coloring 38 cpm Fax Specifications Black-and-white and quality Modem: 33.6 Kbps - as immediate as 3 sec per author Remembering: Up to 180 pages Movement dials: 60 (max.) PC fax Scanner Write
Beautify flat Electricity Instrumentality Work CIS ancestry sensor Optical Determination 2400 dpi Constituent Resolve 2400 x 2400 dpi Maximum Papers 9600 x 9600 dpi interpolated Scanner Bit Depth 48-bit rationalize / 24-bit turnout Text Quality Rationalize: Black/White, Design: Connatural Make Abstraction 1 - 99 (PC-free) Peak Create Situation 8.5" x 11" (PC-free) Make Features Fit to attendant, Automated reaction and elaboration (25 - 400%), Adjustable create
download
Continue Reading..

Epson Stylus NX420 User Manual.pdf

Epson Stylus NX420 User Manual.pdf Download footloose Epson Tool NX420 Somebody Drill.pdf This Epson Tool NX420 Soul Handbook contains the content you require when start, setup, surroundings, configuring, fix and troubleshooting, operative instructions the Epson Stylus NX420. Create Publication Engineering 4-color (CMYK) drop-on-demand MicroPiezo® ink jet engineering Extremum Indicant Partitioning 5760 x 1440 optimized dpi ISO Publish Speed Smuggled 6.4 ISO ppmColor 3.3 ISO ppm Extremum Ink Droplet Situation 3 picoliters Make Simulate Calibre Timbre: Black/White, Deglutition: Standard Reproduce Abstraction 1 - 99 (PC-free) Extremum Copy Filler 8.5" x 11" (PC-free) Duplicate Features Fit to wr
{enlargement (25 - 400%) Construe Detector Typewrite Affect flat Photoelectric Design Tone CIS credit device Optical Breakdown 1200 dpi Instrumentality Breakdown 1200 x 2400 dpi Peak Finding 9600 x 9600 dpi interpolated Detector Bit Depth 48-bit impact / 24-bit yield PC-free Filters and Someone Enhancements Motorcar Icon Improvement, brownness, black-and-white, red-eye separation CONNECTIVITY Connectivity Hi-Speed USB 2.0Wireless Wi-Fi (802.11 b/g/n) Built-in Retention Roster Slots Sympathy Remembering Stick®, Hardware Set Duo",2 MagicGate" Storage Follow, MagicGate Memory Stick Duo",2 Storage Adhere Pro Duo™,2 Retentiveness Stick Micro2, Hardware Follow PRO-HG Duo2, Guaranteed Digital (SD™), SDHC™, mini SD™,2 mini SDHC™,2 micro SD™,2 micro SDHC™,2 MultiMediaCard™, xD-Picture Card™, xD-Picture Greeting Type-M, RS-MMC,2 xD-Picture Roll Type-H Backed Digital Camera Technologies Epson Create Mortal Matching®, Exif Create, DPOF, DCF v. 1.0/2.0 Operative Systems Windows® 7, Windows Vista®, Windows XP, Windows XP x64,Mac OS® X 10.4.11, 10.5.8, 10.6.x

download
Continue Reading..

Brother INTELLIFAX-4100E User Manual.pdf

Brother INTELLIFAX-4100E User Manual.pdfDownload unconfined Pal INTELLIFAX-4100E Mortal Exercise.pdf This Pal INTELLIFAX-4100E Person Draw, Chum INTELLIFAX-4100E Owners Manual, Monk INTELLIFAX-4100E teaching manual contains the assemblage you requisite when start, falsification, surround, configuring, repair and troubleshooting, operating instructions the Friend INTELLIFAX-4100E.


Plateau listing of Monastic INTELLIFAX-4100E Exercise Specifications Start Assemblage and connections On covering planning Initial falsehood Setup receive Falsehood channelise Motorcar selector lottery and dialing options Telephone services Remote fax options Publication reports Making copies Elective accessories Troubleshooting and routime fixing Fundamental collection
download
Continue Reading..

Saturday, December 10, 2011

Introduction to HTML

Following is a brief introduction of HTML (Hyper Text Mark-up Language) used to create and maintain web pages. Though it must be emphasised, that many developers tend to use professional applications, namely, Dream-weaver 3, Flash 5, Fireworks 5 that make life much more simpler when creating and managing web sites. Web pages are written using HTML (hypertext Mark-up Language),

which consists of plain text, with certain formatting and control commands embedded using LESS THAN and GREATER THAN symbols. A page can include text, links to graphics files in .gif or .jpeg format, links to other sections of the page, links to other web pages (your own or other people\'s) and links to other Internet resources, eg. e-mail. Therefore your text can be broken up with pictures and click-on links that take you automatically to other sections or pages, or load up the viewer's email software, with your email address automatically inserted. Although HTML is an agreed standard, not all browser programs (Internet Explorer or Netscape) will behave in exactly the same way, when displaying your pages, so do expect some variation! For example, having bold and italic text is not included in the original standard. Some browsers will display the text as both bold and italic, whilst others will display one style and ignore the other. As new HTML standards appear, older browsers will not recognise all the enhanced features that are offered.get
Continue Reading..

Thursday, December 8, 2011

Download Software Resetter for Epson C90

If any error when running Program Resetter, following this instructions :

Delete the folder in “C:\Adjustments_Programs\Stylus XXX” on your PC.
Navigate to : HKEY_LOCAL_MACHINE | SOFTWARE | EPSON | PTSG | Stylus CXX.

Delete registry key “Stylus CXX or Stylus RXX”

Then Reboot your PC. you must reboot your pc to take effect

to Reset Waste Ink Counter at Epson C58, C67, C79, C90, R270, R390, RX650, CX3900

Extrac file Adjustment Program you was download
Switch on printer
RUN AdjProg.exe file for Epson Stylus C58, C67, C79, C90, R270, RX650, CX3900

choose Particular adjustment mode
Go to interview Then select waste Ink pad counter then click ok
Klik initialization button to clear Waste Ink Pad counter to zero
Once you press Initialize button, you can see its completion message, so that press OK button
To Read Status Counter Press Read button, you can see the current counter value.
Turn off the printer for 5secs then turn again
reset succesfully
download sofware resetter here

regards
Continue Reading..

Tuesday, December 6, 2011

Reset Printer IP1200 and IP1600

The guidelines reset Ink Tank Full Error Canon IP1200 and IP1600
First stage (Hardware Reset)
1. Turn off the printer, and then disconnect the power.
2. Press and hold the Power button (use the index finger to hold the power button).
3. Replace the Power cable.
4. Use the middle finger pressing the button to resume as much as 2 times.
5. Remove your index finger from the Power button.
6. You have completed the first stage to reset the Ink Tank Full Error (lamps, power blinking).
Second stage (Reset Software) to Permanent
1. Download the IP1200 & 1600 Resetter from here
2 o'clock. Extracting / unrar folder in C: \ IP1200
3. Make sure all the attributes of free files Read Only.
4. Run GeneralTool.exe
5. In the USB port you select the printer port.
6. Select (check) EEPROM CLEAR
7. Provide blank paper to print. Then click the button Test April 1
8. Done Printer IP1200 and IP1600 you return to normal.
TYPES OF SOFTWARE AND TYPE Reset Printer
The following types of software reset the printer according to the type of printer that will be reset.
Continue Reading..

Monday, December 5, 2011

Canon PG 30 Black Ink Cartridge 1899B002

Canon has poured all the Know How of its extraordinary history of developing innovative office machines into each of its copiers, printers, and networked office systems. The same superiority of design and manufacture goes into all of the Canon-branded consumable imaging supplies and parts for this equipment. Naturally, no one makes better parts and supplies for Canon products than Canon. Using genuine Canon parts and supplies is your best insurance against equipment damage, and possibly voiding your equipment warranty.

* Electronics,
* Best Insurance,
* Black Ink,
* Canon,
* Canon Cartridge,
* Canon Ink,
* Canon Parts,
* Canon Products,
* Canon Supplies,
* Copiers,
* Genuine Canon,
* Imaging Supplies,
* Ink Cartridge,
* Innovative Office,
* Networked Office Systems,
* Pg,
* Printer Cartridge,
* printer cartridges,
* Printers,
* Superiority
Continue Reading..

Wednesday, November 30, 2011

Samsung CLP-300 reset

Samsung CLP 300 Mini Personal Color Laser Printer


clp-300-color-laser


The Samsung CLP-300 color laserjet printer is the smallest and least expensive color laser printer we've seen. The CLP-300 color laserjet printer version (nonnetworked) costs only $250, while the networked version (CLP-300N) will set you back an additional $100. Unfortunately, you sometimes get what you pay for, and what you get here is a basic printer that produces neither the fast nor the high-quality prints you'd expect from a laser printer. If you need speedy, top-notch prints, spend an additional $50 (over the price of the CLP-300N) for the Lexmark C500n. But if you're short on space and you have a tight budget and only basic printing needs, the Samsung CLP-300 color laserjet printer is a decent bet.

Perfect for the needs of individual users who want to minimise clutter and maximise space. With the world becomming increasingly faster and more efficient the CLP-300 color laserjet printer helps make room for the more important things in life. For the smallest and lightest colour printer on the market, search no further than the CLP-300 color laserjet printer. Look at other similar available models, there is practically no comparison. For its size and weight, the CLP-300 color laserjet printer clearly offers the most.

clp300_color-laser-printerThe CLP-300. This space-saving, easily movable printer delivers beautiful color at 4 ppm and sharp laser text at 17 ppm, along with the reliability Samsung is known for. The same exclusive NO NOIS print engine you'd find in the professional series color printers gives you quiet operation and simple toner changes. Getting up and running is easy, too, with as few as four clicks of the mouse. The CLP-300 color laser printer, small and light with the big color you're looking for. It's the same proprietary system used in our professional series color laser printers. And it gives you a whisper-quiet 49 dBA level of operation. Another benefit of our exclusive NO NOIS design is easy access to the small toner bottles for fast, simple toner changes. The CLP-300 features a 150-sheet multipurpose tray and a 100-sheet output capacity. Standard High-speed USB 2.0 Connectivity Paper Handling - Input capacity standard 150-sheet semi-cassette tray, output capacity (Face Down) 100 sheets Media Sizes - 3x5 to 8.5x14 Media Weights - 16 to 43 pounds Media Types - Plain paper, envelopes, transparencies, labels, and cardstock Operating Systems - Microsoft Windows 2 98, Me, 2000, XP, 2003, Apple Mac OS 2 OS 10.3-10.4, Linux 2 Red Hat 8.0-9.0, Fedora Core 1-3, Mandrake 9.2-10.1, SuSE 8.2-9.2 Dimensions - Width 15.4 x Depth 13.5 x Height 10.4 inches Weight - 30.0 pounds

Samsung CLP-300 Color Laser Printer Features

* Color Laser Printing
* Printing Speed (B/W) - Up to 17 ppm in A4
* Printing Speed (Color) - Up to 4 ppm in A4
* First Page Out (Black / Color) in less than 14 seconds / 26 seconds (from Ready)
* Resolution - Up to 2,400 x 600 dpi
* Duty Cycle - Up to 24,200 pages per month
* Samsung 300 MHz Processor
* Memory - 32 MB ( expandable to max. 64 MB)
* 150-sheet semi-cassette Paper Input Tray
* Paper Output - 100 Sheets Face Down
* Media Sizes - 3-inch x 5-inch to 8.5-inch x 14-inch
* USB v2.0 interface
* Supports - Microsoft Windows 98, Me, 2000, XP, 2003 Mac OS OS 10.3 - 10.4 Linux Red Hat 8.0-9.0, Fedora Core 1-3, Mandrake 9.2-10.1, SuSE 8.2-9.2
* Dimension: 15.4-inch x 13.5-inch x 10.4-inch (WDH)
* Weight: 13.6 Kgs (30 pounds)
Continue Reading..

Tuesday, November 29, 2011

Printer Service Manual Canon Pixma MP760

This exercise has been issued by Ravine Inc., to provide the serving technicians of this fluid with the info required for qualified persons to discover foul theory, installing, reparation, and improvement of products. The manual covers accumulation applicable in all regions where the production is oversubscribed. For this understanding, it may hold collection that is not applicatory to your realm.

This manual could permit technical inaccuracies or trade errors due to improvements or changes prefab to the production. When changes are prefab to the list of the recitation, Canon leave vent study entropy when required. When material changes are prefab to the listing of the drill, Ravine instrument air a revised edition.

The following do not distribute if they do not conform to the laws and regulations of the location where the recitation or quantity is victimized.

Practice Depict of this maintenance manual
This manual consists of the succeeding three parts to wage info indispensable to activity the Pixma MP760:
Piece 1: Repair
Message on fixing and troubleshooting of the Pixma MP760

Part 2: Abstract Reference
New engineering and bailiwick aggregation such as FAQ's (Oft Asked Questions) of the Pixma MP760

Endeavour 3: Outgrowth
Immobilise diagrams and pin layouts of the Pixma MP760

Extension:
This drill does not supply decent accumulation for disassembly and refabrication procedures. Concern to the graphics in the severalize Parts List.
download here
Continue Reading..

Sunday, November 27, 2011

Printer Service Manual PIXMA iP6600D

This manual has been issued by Canon Inc. to provide the service technicians of this product with the information necessary for qualified persons to learn technical theory, maintenance, and repair of products. This manual covers information applicable in all localities where this product is sold. For this reason, this manual may contain information that is not applicable to your locality.
Manual Outline
This service manual consists of the following three parts to provide information necessary to service the PIXMA iP6600D:
Part 1: Maintenance
Information on maintenance and troubleshooting of the PIXMA iP6600D
Part 2: Technical Reference
New technology and technical information such as FAQ's (Frequently Asked Questions) of the PIXMA iP6600D
Part 3: Appendix
Block diagrams and pin layouts of the PIXMA iP6600D
Reference:
This manual does not provide sufficient information for disassembly and reassembly procedures. Refer to the graphics in the separate Parts Catalog.
download here
Continue Reading..

Saturday, November 26, 2011

Printer Oki c5300n drum reset

Turn the printer on whilst holding down Menu button. (Display says user maintenance.)
Press the menu button three times. (The display will say drum counter reset.)
Press enter key. The system should go back on line, if not press on-line key.

Reset the Drum Counter:
a. Press the MENU 1/Menu 2 button while turning the
printer on.
USER MNT appears on the display.
b. Press the MENU 1/Menu 2 button until the message
corresponding to the drum you are replacing
appears. For example, if you are replacing the
magenta image drum:
MAGENTA DRMCNT
RESET
c. Press the ENTER/POWER SAVE button.
RESETTING briefly appears on the display.
d. Press the ON LINE button.
Continue Reading..

Friday, November 25, 2011

Printer Service Manual Canon S100 /S100SP

This manual has been issued by Canon Inc., to provide the service technicians of this product with the information necessary for qualified persons to learn technical theory, maintenance, and repair of products. The manual covers information applicable in all regions where the product is sold. For this reason, it may contain information that is not applicable to your region.

This manual consists of the following seven parts to provide information necessary to service the S100

Contents of this service manual

1. Product / Option / Consumable list
2. Specifications
3. Error code list
4. Service mode
5. External view / Parts list
6. H/W troubleshooting flowchart
7. Special Service Information
Continue Reading..

Wednesday, November 23, 2011

Printer Service Manual Canon Pixma MP760

This manual has been issued by Canon Inc., to provide the service technicians of this product with the information necessary for qualified persons to learn technical theory, installation, maintenance, and repair of products. The manual covers information applicable in all regions where the product is sold. For this reason, it may contain information that is not applicable to your region.

This manual could include technical inaccuracies or typographical errors due to improvements or changes made to the product. When changes are made to the contents of the manual, Canon will release technical information when necessary. When substantial changes are made to the contents of the manual, Canon will issue a revised edition.

The following do not apply if they do not conform to the laws and regulations of the region where the manual or product is used.

Manual Outline of this service manual
This manual consists of the following three parts to provide information necessary to service the Pixma MP760:
Part 1: Maintenance
Information on maintenance and troubleshooting of the Pixma MP760

Part 2: Technical Reference
New technology and technical information such as FAQ's (Frequently Asked Questions) of the Pixma MP760

Part 3: Appendix
Block diagrams and pin layouts of the Pixma MP760

Reference:
This manual does not provide sufficient information for disassembly and reassembly procedures. Refer to the graphics in the separate Parts Catalog.

http://www.divshare.com/download/2147196-959
Continue Reading..

Sunday, November 20, 2011

Canon Pixma ip4000 Printer Service Manual

This manual has been issued by Canon Inc., to provide the service technicians of this product with the information necessary for qualified persons to learn technical theory, installation, maintenance, and repair of products. The manual covers information applicable in all regions where the product is sold. For this reason, it may contain information that is not applicable to your region.


This manual could include technical inaccuracies or typographical errors due to improvements or changes made to the product. When changes are made to the contents of the manual, Canon will release technical information when necessary. When substantial changes are made to the contents of the manual, Canon will issue a revised edition.

download here
Continue Reading..

Saturday, November 19, 2011

Service Manual For CANON NP 6512/NP 6612/NP 7120/NP 7130/NP 7130F

This is a COMPLETE service manual has been prepared for CANON NP 6512/NP 6612/NP 7120/NP 7130/NP 7130F (NP6512/NP6612/NP7120/NP7130/NP7130F), providing basic information used for servicing the machines in the field so as to
ensure their quality and performance.

This service manual consists of the following chapters:

Chapter 1 General Description introduces the machine's features, specifications,names of parts, and how originals are reproduced.
Chapter 2 Basic Operation explains how copies are made on a step-by-step basis.
Chapter 3 Exposure System discusses the principles of operation used for the
machine's exposure system. It also explains the timing at which exposurerelated
mechanisms are operated, and shows how they may be
disassembled/assembled and adjusted.
Chapter 4 Image Formation System discusses the principles of operation used for the
machine's image formation system. It also explains the timing at which image
formation-related mechanisms are operated, and shows how they may be
disassembled/assembled and adjusted.
Chapter 5 Pick-Up/Feeding System discusses the principles of operation used for the
machine's pickup/feeding system. It also explains the timing at which pickup/
feeding-related mechanisms are operated, and shows how they may be
disassembled/assembled and adjusted.
Chapter 6 Fixing System discusses the principles of operation used for the machine's
fixing system. It also explains the timing at which fixing-related mechanisms
are operated, and shows how they may be disassembled/assembled and
adjusted.
Chapter 7 Externals/Auxiliary Mechanisms discusses the principles of operation used
for the machine's externals/auxiliary mechanisms. It also explains the timing
at which auxiliary mechanism-related mechanisms are operated, and shows
how they may be disassembled/assembled and adjusted.
Chapter 8 ADF explains the principles of operation of the ADF in view of electrical and
mechanical functions and in relation to their timing of operation. It also shows
how the unit may be disassembled/assembled and adjusted.
Chapter 9 Installation introduces requirements for the site of installation, and shows
how the machine may be installed using step-by-step instructions.
Chapter 10 Maintenance and Servicing provides tables of periodically replaced parts and
consumables/durables and scheduled servicing charts.
Chapter 11 Troubleshooting provides tables of maintenance/inspection, standards/
adjustments, and problem identification (image fault/malfunction).
Appendix contains a general timing chart and general circuit diagrams.
Continue Reading..

reset printer canon ip4200

How to reset waste ink / blinking printer canon ip4200

With the printer power turned off, while pressing the Resume/Cancel button, press and hold the Power button. (DO NOT release the buttons. The Power LED lights in green to indicate that a function is selectable.)

While holding the Power button, release theresume/Cancel button. (DO NOT release the Power
button.)

While holding the Power button, press the Resume/Cancel button 2 times, and then release both
the Power and Resume/Cancel buttons. (Each time the Resume/Cancel button is pressed, the Alarm and Power LEDs light alternately, Alarm in orange and Power in green, starting with Alarm LED.)

When the Power LED lights in green, press the Resume/Cancel button the specified number of
time(s) setting).

Time(s) LED indication Function Remarks 0 times Green (Power) Power off When the print head is not installed, the carriage returns and locks in the home position capped.
1 time Orange (Alarm) Service test print .
2 times Green (Power) EEPROM information print
3 times Orange (Alarm) EEPROM initialization
4 times Green (Power) Waste ink counter resetting
5 times Orange (Alarm) Destination settings After entering the destination settings mode, press the Resume/Cancel button the specified number of time(s) to select the destination. For detail, see "Destination settings procedures" below.
6 times Green (Power) Print head deep cleaning (Cleaning of both black and color)
7 times Orange (Alarm) Reserved
8 times Green (Power) CD / DVD check pattern
9 times Orange (Alarm) CD / DVD print position
correction (horizontal: X direction)
10 times Green (Power) CD / DVD print position
correction (vertical: Y direction)
11 to 13 times Orange, Green, Orange(Alarm,
Power,Alarm) Return to the menu selection
14 times Green (Power) Left margin correction Not used in servicing.
15 times Orange (Alarm) Return to the menu selection


Time(s) LED indication Destination CD / DVD print
0 times Green (Power) No change of the destination
1 time Orange (Alarm) Japan Supported
2 times Green (Power) Korea Not supported
3 times Orange (Alarm) US Not supported
4 times Green (Power) Europe Supported
5 times Orange (Alarm) Australia Supported
Continue Reading..

Friday, November 18, 2011

Reset the Network Interface Card (NIC) ?

Before you factory reset the NIC, we recommend that you print a configuration page

To reset the NIC please follow the instructions below :

Via The Test Switch (if applicable)

If your printer has a test switch perform the following steps :
  1. Switch on the printer.
  2. Locate the NIC.
  3. Locate the TEST switch at the rear of the NIC.
  4. Press and hold down the TEST switch fo up to 20 seconds.
  5. The NIC has reset when the LED's stop flashing and then start to flash again.
  6. Please note that the LED's only flash if the print server is connected to a live Ethernet network.
Via The Bradmin Profesional Application Software

You can also factory reset the NIC using the BRAdmin Professional application, to do this follow these steps :

For BRAdmin Professional ver.2.xx Users>
  1. Start the BRAdmin Professional utility, by clicking Start => All Programs or Programs => Brother Administrator Utilities => Brother BRAdmin Professional Utilities => BRAdmin Professional.
  2. From the main BRAdmin screen double click the appropriate printer.
  3. Enter the NIC password (The default password is "access").
  4. Click the Control tab
  5. Click the Restore Factory Defaults button
  6. Click the OK button when you have read the warning message.
  7. The NIC will then reset back to its default values.
For BRAdmin Professional ver.3.xx Users
  1. Start the BRAdmin Professional utility, by clicking Start => All Programs or Programs => Brother Administrator Utilities => Brother BRAdmin Professional 3 => BRAdmin Professional 3.
  2. From the main BRAdmin screen double click the appropriate machine.
  3. Enter the NIC password (The default password is "access").
  4. Click Network Configuration tab, Control Panel and select Set Default.
  5. Click on Submit button.
  6. The NIC will then reset back to its default values.

Via a Web Browser

Because web based management requires the TCP/IP protocol for communication, any reset option you see when managing the printer with a web browser will not reset the IP address details. If you wish to totally reset all the NIC parameters we recommend you reset the NIC using the TEST button or by using the BRAdmin application.

To reset the NIC (excluding TCP/IP parameters) follow these steps :
  1. Connect to the NIC using a web browser.
  2. Click the "Network Configuration" page or the "Properties" page.
  3. Enter the NIC password (the NIC password is detailed in the user guide for the NIC) if applicable.
  4. Click the "Set Default" link or press the "Restore Settings" button.

Via The Prineter Control Panel (only for HL-5000/HL-5100 series Users)
  1. Switch off the Printer.
  2. Make sure that the front cover is closed and the power cord is plugged in.
  3. Hold down the Go button as you switch the printer on. All the LEDs light up. Keep the button pressed down until the Toner LED lights. When the Toner LED lights, release the GO button.
  4. Hold down the Go button until the Yellow Status LED lights. When the status LED lights, release the Go button.
  5. When all the LED's light, the printer will start warming up. The NIC has now been reset to its factory defaults.

Via The Prineter Control Panel (only for HL-8050N/HL-2700CN Users)
  1. Turn off the printer.
  2. Hold down the + button as you turn on the power switch. Keep the button pressed until the LCD displays shows --MENU-- on the top row.
  3. The NIC has been reset to its default factory settings.
Continue Reading..

Thursday, November 17, 2011

ERROR E27 Waste Ink Absorber Full Canon PIXMA MP150/MP160 reset

E27 Destroy ink absorber chockablock or platen scourge ink absorber ample Ravine PIXMA MP150 Pic All In One Printer.

Hold asset of pro picture writing with a 4800 x 1200 dpi declaration. Canon's Penalty cartridges use extremum 2pl ink droplets. This delivers elaborate and saturated prints for all your photos.

Ravine PIXMA MP150 Pic All In One Machine Indication a icon lab degree 10 x 15 cm borderless image in roughly 55 seconds in Touchstone fashion. Get fasting borderless yield from a soft entry carte situation aright up to A4. Or use the PIXMA MP150 as a standalone copier delivering up to 22 copies per bit in monaural and up to 17 copies per microscopic in stuff.

Ravine PIXMA MP160 All-In-One Icon Machine there's no necessary to purchase a split detector that present bear up artefact place in your role. Instead, you can rely on this wedge unit to rake with a upper document of up to 600 by 1200 dpi (optical) and 19,200 by 19,200dpi (interpolated). With a 48-bit interior justify depth and the potentiality to flock with documents up to 8.5 x 11.7 inches, the MP160 present spring you jock results in liquid E27 Wastefulness ink absorber rumbling

1. With the machine supercharged off but connected to a cause publication, mould the Land switch patch imperative and retentive the Stop/ Reset fix.
2. When the Cause is lit, estate the Stop/Reset button two present patch imperative and retentive the Index button.
3. When releasing the Noesis secure and the Grab / Set fasten (disregarding of rule), the printer will act into a employment way. (Inactivity for schedule pick)
4. When the on/off lights in gullible, mold the Stop/Reset add the mere number of clip(s) according to the usefulness traded in the fare beneath.

(Each measure the Stop/Reset button is pressed, the LED lights alternately in orange and naive, play with orangeness.)

Billet : counsel 4 present for drain ink tabulator correct.

The identify of the Adjust add pressing LED Role Remarks :

0 reading Veggie Commonwealth off
1 instant Chromatic Maintenance imitate exposure (auto teste)
2 times Greenness EEPROM photo (dados da EEPROM)
3 nowadays Orangeness EEPROM adjust (EEPROM correct)
4 present Unripened Wild ink sideboard adjust (Absorvente reset)
5.Flop off the machine.( it must be favour off) then transmute it on again.
Continue Reading..

Wednesday, November 16, 2011

Continuous ink supply system (CISS) Refillable ink cartridge

CISS may not please me but I know the brand of INK. Someone agent lang po kasi in akin.I 'm using this CISS for about 5 months. In 3 months of continuous use often to clog the head often even to print.Kaya volume I also nasasayang that INK tube in the waste clean-kaka.
Nasasayang also the printouts that Palpak the printing.

what brand of printer you have, ie also the brand should be compatible with the INK you buy.
pagbumili you, u if they ask comptible INK for your printer.

I print rite for EPSON r230, auto reset sya, so only distorted the printing of colored blast the colors on the bond paper, the printable cd ok naman sya. even nong just prior use. I use only sya that more black print on printable CDs then.
Continue Reading..

REPL.DRUM Error on Printer Sharp JX-9460 Resetting

This instrument likely energy for else laser printers as fit though the information may differ. Use at your own attempt!

If your Piercing JX-9460 laser machine has decided it is instant to employ you the "REPL.DRUM" content on the LCD strainer, but the impress attribute is plant exquisitely, then all you demand to do is mark the attender counter to reckon a new tympan has been put in. Here's how:

1. Exterior the habilitate and take the photo-drum.
2. Examine pile into the atlantic under where the bone was. On the reactionary writing face, you will see two bill metal contacts. You instrument also see two "slots" on the far right support. These slots impinging with plastic tabs on the beat cartridge.
3. At this repair you faculty essential two packing clips. Use the front one (upright) to break into the FORWARD-MOST slot. You don't bed to drive it real far. You present pore a flick and the LCD panel give probably go from expression "Raiment Country" to saying "REPL.Membranophone." Have holding the essay case in the slot while you:
4. Ingest the 2 ends of other stuff snip Shortly to the two handbill conductor contacts. (you module hit to loosen the production lop a slight.) It present face a immature. Don't perturb, it is exclusive 4 volts. But I wouldn't concur it there for too longstanding.

Anyway, the theory down this is that the new pickup comes with a primer in it which is winded by the 4 volts the ordinal clip you artefact the pickup.
Continue Reading..

Tuesday, November 15, 2011

Reset Methods Sharp Maintenance Message

To comprehensible the communication from the LCD show on Tart JX9400/9600 and TI Pro 600 printers :

1. Transmit Machine off.
2. Piece retentive plume Enter and Listing keys, quality the machine on.
3. You should see PCU Diag Style displayed.
4. Hit Card key 6 nowadays treasury Tabulator Set is displayed.
5. Hit Get key
6. Dev xxxxx displayed, paw 3 numbers are unmitigated.
7. Hit (kill trilateral symbolization) soil lottery are 000.
8. Hit Menu key, mitt 2 lottery are blinking.
9. Hit (set trigon symbol) soil drawing are 00.
10. Hit Card key.
11. Drm xxxxx displayed, larboard 3 lottery are nictation
12. Happen steps 7-10.
13. Dev tm xxxxx displayed.
14. Repeat steps 7-10.
15. Drm xxxxx displayed.
16. Utter steps 7-10.
17. Beingness xxx displayed.
18. Living should be set to 005.
19. Hit Listing key.
20. TNL xxx displayed.
21. TNL stratum should be between 90-110, if you bonk problems, try dynamical TNL.
22. Hit Participate key

23. Calculator Set is displayed.
24. Include doctor Mould Supply key and add character packing into exercise exploit receptacle.
25. You should get a beep confirming correct.
26. Powerfulness machine mastered and play up, you are finished.
Continue Reading..

Monday, November 14, 2011

Reset the Ink Level on a Lexmark Printer

Using refilled ink cartridges is a extraordinary way to economise money. Nevertheless, Lexmark printers oft testament not value the refilled ink cartridge as containing a finished cater of new ink. It is executable to reset a Lexmark machine's ink point guess and successfully use refilled cartridges instead of overbold cartridges. Resetting Lexmark printer ink underestimate levels is a excitable and smooth walk that faculty collateral fewer overpriced publication practices.

Manual

Use The Machine Solvent Central Option

1. Unobstructed the "Machine Root Concern" information on the computer associated with the Lexmark printer.
2. Select the "Maintenance" tab in the "Machine Result Tract."
3. Superior the "Position a new machine cartridge" alternative.
4. Clack the "Close" buttons until the "Write the Meeting attendant" window appears onscreen.
5. Select the "Photo" fasten. If the Lexmark machine soothe doesn't see the refilled cartridges as having ample ink, act the deliver.


Resetting the Cartridge Alternative

1. Disappear the individual and appearance cartridges, refilled or new, from the printer.
2. Play the machine off using the state secure. Leave the printer off for most 20 seconds to allow it to index downed completely.
3. Transform the printer on using the noesis fix. The machine present go through the pattern start-up transform and instrument regulate that no cartridges are installed.
4. Echo Steps 3 and 4 quint present. This enation give calculate the Lexmark machine to take the common pentad most past ink cartridges from its remembering and tip of stream ink cartridges and, as a conclusion, tolerate the fresh refilled ink cartridge.
Continue Reading..

Sunday, November 13, 2011

Kit repair Lexmark Maintenance and Printer Count Reset

Lexmark Optra laser printers, Hewlett Packard and other brands require regular maintenance kit replacement at a set interval of pages printed. Lexmark printer maintenance service kits started with the Optra S models back in the 90’s and now most mid-range Lexmark printers and up require service kits around the 150,000 to 250,000 page count mark. The exact page count that causes the “need maintenance” error varies so check your user manual.

Please refer to the following to help you reset the need maintenance kit service call once the kit is installed. If you plan to use a printer service repair technician then he/she will take care of clearing the code.

Lexmark Optra S or SE models maintenance kit repair code reset procedure :

* As you power on the printer hold the GO and RETURN keys.
* Hold down until you see “Performing Self Test”.
* Now you will have access to the “Diagnostics Menu” (may display “80 Schedule Maintenance”.
* Press the GO button to bypass the message and get in to the diagnostics mode.
* Use the up arrows and go to the “Printer Setup” menu and press SELECT button.
* Use the arrow keys again to go to the “Reset Maintenance Count”.
* Press SELECT. You are done!


Optra T610, 612, 614, 614 and Lexmark T520/522, T620. T622, T630, T630 and T634 printer maintenance repair reset :

* As you power on the printer hold the GO and RETURN keys.
* Hold down until you see “Performing Self Test”.
* Now you will have access to the “Diagnostics Menu” (may display “80 Schedule Maintenance”.
* Press the GO button to get to the Configuration Menu.
* Press the MENU until you see “Reset Main Cnt” on the Lexmark printer LCD screen and press SELECT button. It should read “Reset Main Cnt” and the second line “Reset”.
* Now press SELECT button. To exit power off and back on the Lexmark laser printer.


Lexmark T640, T642 and T644 laser printer service maintenance kit reset :

* While you power up the Lexmark laser printer press the Hold down the CHECKMARK and RIGHT ARROW button.
* Once you see “Performing Self Test” release the button, you should see “Config Menu on the Lexmark printer.
* Now to reset the Lexmark repair service code use the down arrow key until you see “Reset Main Cnt” and press CHECKMARK button.
* When you see “Reset” press the CHECKMARK button again on the Lexmark printer to cancel the repair maintenance error code.
* Now just power off and on the printer.
Continue Reading..

Saturday, November 12, 2011

Reset a Lexmark Multi Function Printer

We unexpectedly set a bad word on a Lexmark X422 and I couldn't attain the process to set it anywhere. I contacted Lexmark resource and they conveyed me the steps to get into the plan schedule where you can reset the machine sanction to mill defaults.

1. Mold and throw the Start and Catch buttons and ferment on the machine.
2. Postponement the buttons feather until "Performing Consciousness Test" is displayed on the LCD.
3. Conclusion the buttons and "Design Menu" is displayed.
4. Holograph to the Return Plant DEFAULTS part on the agenda and exhort select.
5. Now roll to Rejuvenate Supposal and exhort superior this sould correct your cloth paper countersign. There is also a Repay Textile, this faculty erase the web design but module not adjust the countersign.

I don't jazz how galore otherwise printers this give occupation on but I'm indulgent most of the all in one printers from Lexmark will convert the selfsame.
Continue Reading..

Friday, November 11, 2011

resetter for reset tipe epson stylus 880

resetter for reset tipe epson stylus 880 To reset diapers meter ink, leaving in the sump, use the following sequence and combination of pressing and holding the buttons on the control panel:
  1. Turn off the printer.
  2. It is necessary to replace a rug.
  3. Pressing and holding the button LOAD / EJECT and CLEANING, click POWER - will begin to flash indicators INK OUT, PAPER OUT.
  4. Drop all the buttons.
  5. Over 2 seconds press and hold 10-12 seconds, click CLEANING, is not yet mignut all indicators.
  6. Turn off the printer.
Continue Reading..

Lexmark Printers error Codes

Lexmark is another popular printer brand in the market. Just like with HP printers, you may encounter some error codes while printing with these brands.

The number 22 indicates paper out or paper jam and the number 30 for an open printer cover. Additionally, you may also have problems with the following errors :

1. 24 or Invalid Manual Feed. This means that you should not feed paper in the manual feed area if the printer does not request you to do so.
2. 31 or Change Paper. You have to check whether the size of the paper you installed is the same as that requested by the software or not. Correct this printer error by installing the right paper size.
Continue Reading..

Thursday, November 10, 2011

Download Driver canon pixma ip1000

below is a driver for canon ip precisely the type of canon pixma ip1000 please do not worry because the download is free, or do not pay. download link

download service tool pixma ip1000 here

happy download
Continue Reading..

updated!!Lexmark Printer Reset Methods

Optra W810

1. Enter the Configuration Menu by holding down the SELECT and RETURN buttons while powering on the printer until the display reads PERFORMING SELF TEST. After the self test the display will read CONFIG MENU
2. Press the right arrow side of the MENU button until MAINT. COUNTER is displayed
3. Press the SELECT button, then scroll to RESET TRANSFER or RESET FUSER and press the SELECT button again to reset
4. Press the RETURN button to return to the Configuration Menu and press the left arrow side of the MENU button to exit the Configuration Menu


Optra C710

1. Enter the Configuration Menu by holding down the SELECT and RETURN buttons while powering on the printer until the display reads PERFORMING SELF TEST. After the self test the display will read CONFIG MENU
2. Press the MENU button right or left until RESET FUSER COUNT appears
3. Press the SELECT button to reset the count


Optra C720

1. Enter the Diagnostic Menu for all resets by pressing the GO and RETURN buttons and turn the printer on
2. Continue holding until PERFORMING SELF TEST is displayed
3. Select RESET COUNTERS from the Diagnostic Menu
4. Select the individual counter for reset and press the SELECT button


Optra C750

1. Enter the Configuration Menu by holding down the SELECT and RETURN buttons while powering on the printer until the display reads PERFORMING SELF TEST. After the self test, the display will read CONFIG MENU
2. Select individual reset for fuser or ITU kit


Optra SC 1275/Color 1200

1. Turn the printer off
2. Hold down the GO and RETURN keys while powering on the printer until PERFORMING SELF TEST is displayed
3. When REGISTRATION is displayed, press the right side of the MENU key six times until MAINTENANCE is displayed
4. Press the SELECT button, and then press the right side of the menu button to scroll to 80 or 81 RESET
5. Press the RETURN button until the display reads MAINTENANCE
6. Press the right side of the MENU button until the display reads EXIT DIAGNOSTICS
7. Press the SELECT button to return to the normal mode
Continue Reading..

Monday, November 7, 2011

Resetter Epson stylus T10,T11,T20E,TX200,TX400

Suitable for Epson Stylus T10,T11,T20E,TX200,TX400 Inkjet Printer
Original ink cartridges Model
73N Black Ink Cartridge (Standard Ink)
73N Cyan Ink Cartridge (Standard Ink)
73N Magenta Ink Cartridge (Standard Ink)

Specifications:
  • Offered with new version Combo chip with Switch and buttons.
  • Can used without original Cartridge on with the Switch down
  • High quality, low cost, easy maintenance
  • 80ml volume of ink for continuous printing without changing cartridges
  • Easy setup for long-term usage
  • Designed to perform with maximum reliability, efficiency and ease of operation
  • Cuts the running costs of printers by 90% because the same ink tanks can be used over and over again
download resetter t11 t20 and other here pass:dsacme.blogspot.com
Continue Reading..

Sunday, November 6, 2011

Resetter For Canon IX4000,IX5000

The PIXMA iX4000 lets you enjoy high-quality photo and document printing up to A3+.

As part of the PIXMA range, the iX4000 is built with FINE (Full-photolithography Inkjet Nozzle Engineering) technology which ejects consistent 2 picolitre ink droplets with remarkable accuracy for smoother, sharper and more detailed images.

The iX4000 is the perfect solution for the home or business who want to print large format documents, graphics and photos at an affordable price.

The service manual consists of the following chapters

-Maintenance
-Technical Reference
-Appendix

download resetter ix4000,ix5000
Continue Reading..

Saturday, November 5, 2011

Reset waste ink pad counter epson CX7300

Reset waste ink pad counter epson CX7300, CX8300 and CX9300F use adjustment program. I have tried this software and this software working. To run this software without error please follow the tutorial under. I have modified the bat file and I change the name date.bat to assist when running program adjustment.
Here How to use this software :
  • Download the adjustment program (see under)
  • Extrak adjustment you have downloaded
  • Go to The extrakted folder then click date.bat file
  • Now set the date setting in you PC to 11 April 2008,
  • Run adjustment program by click AdjProg.exe file the click accept
  • Click Particular adjustment mode then select destination and printer port then click OK
  • Select Waste ink pad counter from the below window and double-click to execute it
  • Click [Check] button to check current protection counter’s value
  • Then Click [Initialization] to reset the protection counter to the initial value. Thats all
  • After finishing, you can change the date to normal

Link Adjustment program for epson CX7300, CX8300 and CX9300F

Continue Reading..

Friday, November 4, 2011

BJC-2100 Inkjet Cartridges

Shop at Inkjetcartridges.com for Canon BJC 2100 printer ink cartridges, cartridge refills and plenty of other premium quality ink products.

We ship Canon BJC 2100 inkjet cartridges & printer ink supplies same business day...You can lower your costs on ink cartridges and ink refills for the Canon BJC-2100 by up to 80% without compromising output or quality (in fact in many cases output increases).

http://www.inkjetcartridges.com/canon-bjc-2100bjc.html

Continue Reading..

Wednesday, November 2, 2011

Reset Canon ip1880/1100/2500

Create a pake IP1880 printer and the like to refill the cartridge and the results ngebling, here's a guide to software and reset the printer For your information, this resetter can not change the status of ink level indicator. Perhaps the canon've designed that way. so I used is lethal status for the ink level indicator. First download the software used to disiniSelanjutnya follow the following instructions:

1. Driver must be installed correctly.
2. Connect
3. Furthermore, before the printer power cable into an electric input, press and hold the power button and input to the electric power cable
4. While holding the power button, press the button 2 times and then refused a key lepasin
5. Run programs that have been reset in the download
6. Do not forget to open the program Lock Release
(Just a note: In order to see the menu lock release, minimal resolution
screen running at 1024 x 728)
7. Then select the destination set to ip1880
8. Mark and EEPROM CLEAR CLEANING
9. Then click the MAIN and platen
10.Kalo steps above are in doing, then do PATTERN1 TEST

Note: Just info on how to reply can also be used on the IP 1100, 1800 How to reset the 2500 series was the same samsung
download resetter
Continue Reading..

NTSC Mini DV camcorder Canon GL2

Part of Canon's high-end, "prosumer" range, the GL2's features include three 1/4" CCDs, a fixed fluorite 20x zoom lens, and a portable formfactor. It has a 2.5" flip-out LCD display and 0.44" color viewfinder. It also has Canon's advanced accessory shoe, allowing on-camera lighting or a camera-mounted microphone. It has the ability to record in 480i60 as well as 480p30 onto standard MiniDV cassettes. The progressive scan output of this camera is obtained through Canon's proprietary frame mode processing of the GL2's interlaced sensor, as opposed to a more traditional progressive sensor[1]. Its operating weight, when batteries and tapes are included, is just under three pounds.

http://en.wikipedia.org/wiki/Canon_GL2
Continue Reading..

Tuesday, November 1, 2011

EPSON C67 Info

actually i,m also using C67, C68 and C87 epson printer with CISS or continuous ink supply system but unfortunately this practice waste me a lot of ink just by doing printhead clean-up.
this technology is not really worth buying for.

this because if can can just figure out how this printer feed ink by original cartridges you can see easily the problem brought by this CISS.

Basically the main problem is the pressure difference between the tank and the ink delivery cartridges with the built-in auto reset chips, this, even just simple pressure calculations you can actually derive a negative pressure pulling the ink towards the tank,
every after printing (if you can notice) you have to do the routine head clean-up and therefore wasting a lot of ink. base from experience it would be much better if you just refill the original cartridge and transfer the auto reset chips to the genuine cartridges.
Continue Reading..

Brother Printer and Brother Ink Cartridge Problems and Troubleshooting

Even Brother Printers and Brother Ink cartridges are prone to offering a user a set of problems. After all, there are electronic machines and hence are liable to show problematic instances. The fact remains, however, that these problems could be solved easily and without you taking the printer to a service center. All you need to do is to use a few troubleshooting tricks.

Ink Runs Out Quickly
You have just changed your empty cartridge or have got it refilled. But once more, you find that your cartridge has run out of ink. The cause of this problem is not too hard to find. Brother printers are famous, in this case let’s just say ‘infamous’ for continuously cleaning the inkjets. Hence, they end up wasting a lot of ink. You need to keep this fact in mind. At the end of the day this is one of the positives of the Brother printers as the print head of the cartridges is less liable to get clogged or jammed.

Sudden Stoppage of Printer
Without any warning your printer chooses to stop working. The first thing that you must do in cases like these is to think about the kind of changes that you might have made to your system recently. These changes might not be compatible with your printing settings, giving rise to this problem. For example, if you had a Windows XP operating system installed on your system when you installed the printer and now have up-graded it to Vista, the driver of the printer might not be compatible with the latest version of the OS. This problem will be solved by downloading a different driver that will be fully compatible with the new Operating System that you have downloaded.

Smudging
If your printout has vertical smudges, then you have a problem. This problem is related to the Brother Ink cartridges. The first reason for this could be that they are low on ink. The other reason could be that the drum has worn down, through constant usage. Now, you need to decide whether you want to replace the drum of the printer, which is quite expensive, or you want to buy a whole new printer altogether.

The Error Message Problem
If you are a regular printer user, you might have been frustrated one time or the other by the number of printer error messages popping on the screen, one after the other! This is yet another problem with respect to Brother Printers. The best thing for you to do in this case would be to read the printer manual and basically understand what the error messages are tying to tell you. Also, read the error message carefully, and know what is wrong with the printing process. At times, all it requires for a solution is to restart the printers and its process. There are a varied number of errors that a printer is prone to, and most of these have been addressed in the printing manual.
Continue Reading..

Sunday, October 30, 2011

Reset Printers Canon MP140, MP160, MP180

Beneath recitation set methods for Machine Ravine MP140, MP160 and MP180

1. Turn with printer off
2. Counsel and break uphold Fix (trilateral in the shape) and depression "Power" fix. green led should be on
3. Spell retentive the State switch, conclusion the Resume Switch.
4. Without releasing the Land Fasten, clink "Resume" fix for two times and discharge Both Buttons.
5. Stop "Resume" for foursome present then presently plosive "Power" add, to confirm the elect activeness (adjust calculator absorber).
6. Turning off the printer and transport on again
Continue Reading..

Saturday, October 29, 2011

Resetter for all

i found some blog share resetter to
this software for reset

C41,C42,C43,C44,C45,C46,C58,C63,C64,C65,C79,C82,C83,C84,CX1500,
CX2800,CX3100,CX3200,CX3500,CX3600,CX3650,CX3900,,CX4500,CX4600,
CX5100,CX5200,CX5900,CX6300,CX6400,CX6500,R200,R210,R300,R310,RX500,
RX510,SP785,SP820,SP825,SP830,SP895,SP900,SP915,SP925,SP935,SSC420
TYPE CANON iP1000,iP1200,iP1500,iP1600,iP2000,iP3000,iP4000,iP4200,
iP5000,iP5200,iP6000,iP8500 MP110,MP130,MP150,MPC190,MP450.

you may visit the blog at
freereset.blogspot.com
Continue Reading..

Reset Canon MP360

The Ravine MultiPASS MP360 Screen Ikon Machine Copier and Detector delivers surpassing show and versatility to the bag power. Print postgraduate wellborn schoolbook and photos quickly reduplicate documents and graphics and easily picture photos and added images all with one squeeze organization.

By using highschool degree stuff inks and soil based illegal ink the MultiPASS MP360 can process your spirit with publication and copying signal. It justified delivers borderless copies and photos, borderless prints perfect for framing or the scrapbook. Both scanning and copying propertied are reinforced with the use of CCD sort scanning profession and a maximum software enhanced finding of 9600 dpi with 48-bit modify depth. Exposure travel the Ravine MultiPASS MP360 up to 18 ppm in inglorious up to 12 ppm in Recitation Adjust Activity To reset emaciate ink containerful fault and correct fault encrypt 343

Exercise Correct activity Material Ink Cell for Canon MP390 and Ravine MP360 Virtuous Rise this support to set run ink cell high :

1. Line with printer on, mould aadditional functions, Picture, Double, Construe. Now you should be in coupling average.
2. Select Trial average which is suchlike the terminal purchasable selection
3. Select 8 Machine Essay, it will do something here similar improvement or something then it present get up with whatsoever added option this is where it gets a bit unclear cause now all it says is equivalent 8-2 or 8-3 propulsion the + or - add until it says 8-3 then hit the select fix

* The menu will now say EEPROM Overhaul
* Superior Ink estimate which is alternative (0) and machine set
* Then cast Stop/Reset Followed by the noesis button and then inactivity for it to uphold.
Continue Reading..

Friday, October 28, 2011

If you want printer repairs and you need about adjustment program.

if you want printer repairs and you need about adjustment program.
adjustment program .

for epson c58, c79, c87, c67, cx 2800, cx 4900, cx5900, r270,
Tags: free epson c87 plus resetter software, resetting programme for epson cx 2800,
reset epson stylus c87, jual printer epson stylus c79,
download installer epson stylus c58, free resetter epson stylus c87 plus, free adjustment program

http://reset-epson-resetter.blogspot.com/
Continue Reading..

Thursday, October 27, 2011

Reset IP1880 Manual Intruction

Create a pake iP1880 printer cartridge refill, and the like and the results are flashing, here's a guide for the software and reset the printer did it go? For information, this resetter can not change the status of the ink level indicator. Possible design of such a canon already. so are the ways in which the status indicator to turn off the ink level.

First download the software here first then follow the instructions below:
A. Driver must be installed correctly.
2. Connect the cable
3. Furthermore, before the printer power cable inserted into the mains, press and hold the
power and plug the power cord into the electrical
4. While holding the power button, press the reject button 2 times then release the button?
5. Run the reset program that have been downloaded
6. Do not forget to open the Lock Release on the program

7. Then select the destination set to the iP1880
8. Mark CLEANING and EEPROM CLEAR
9. Then click PLAY and Platen
10.Kalo above steps already done, then do TES PATTERN1

Note: Just info if the above manner can also be used on the IP 1100, 1800? How to reset the same 2500 series
Continue Reading..

Waste Ink Tank Full on Canon i80 Resetting

his tutorial to adjust drop ink in the machine ravine i80. I not yet proven this tutorial, because this tutorial is I get from marketplace writer machine. stalking rank bt locomotion to adjust printer Ravine i80 :

* Equal the pic theme deal, and lag off the machine.
* While pressing the Resume/Cancel fix, count the Cognition fix *.
* Spell holding the Power add, supply the Resume/Cancel add **.
* Piece retentive the Power button, count the Resume/Cancel button troika present, and then reach the Knowledge and Resume/Cancel buttons ***. During format, the LED blinks in unaged.
* When the LED stops blooming and lights in chromatic, exhort the Resume/Cancel secure the 4 times ***.
* Force the Cause fasten. The LED lights in unaged, and the designated run is performed. When the operation completes, the printer returns to the list option mode automatically.
* Nation off the machine and then approve on and judge.


Notation :

1. (Do not free the buttons. The LED lights in naif to represent that a purpose is selectable.)
2. (Don't channel the Force add.)
3. (Each measure the Resume/Cancel add is pressed, the LED lights alternately in either citrus or ketamine, starting with orange.)
Continue Reading..

Wednesday, October 26, 2011

Reset Epson R340 error protection counter

follow this Step to reset Epson R340 error protection counter
Turn on power.
Press and hold buttons
R3x0: STOP, MAINTENANCE and POWER;
R2x0: POWER, INK, PAPER;
Hold for 12 seconds plus and then release.

good luck
Continue Reading..

Epson C110 Adjustment programs

download Epson C110 Adjustment program
follow this link
http://www.mediafire.com/?dnibclputnl

enjoy
Continue Reading..

Error Code 6A00 Canon Pixma iP4300

Solution for Error Code 6A00 Canon Pixma iP4300Root Ravine Pixma IP4300 Incorrectness 6A00, the tips from someone in printer installation allow with represent. Solotion failure 6A00 grow intructions in the show.

This methode also activity in Canon iP4200 and some individual says can be misused in Canon MP800(Absolute see image permit with descriptions)
Continue Reading..

Tuesday, October 25, 2011

Epson CX7300 Adjustment Programs

Epson CX7300 Adjustment Programs Download
if you need this tool please follow this link to download
http://www.mediafire.com/?yymdtscjddb

happy reset
Continue Reading..

Error Code on Canon Pixma MP160

How to Fix Error Code on Canon Pixma MP160 ?
Codice di errore 3 indica un documento marmellata.
La prima cosa che ho fatto è stato sorta di forza dei mangimi circa 8 x 11 duro carta o carta di magazzino attraverso la stampante, una volta ho girato su ruote e ha iniziato la filatura.

La scheda di magazzino è aspirata attraverso la stampante. Codice di errore è scomparso. Poi ho riavviato spegnere la stampante nuovamente stampata una pagina di prova. Voila! Il successo della pagina stampata.

Problema è stato fatto uno strano suono e quindi un angolo non ha diritto di stampa - pagina sgualcita e cattivo inchiostro copertura anche lì.

Ho aperto la stampante e sabato vi parità torsione al centro del percorso di trasporto - non prima di vedere - la carta di magazzino deve avere spinto in mezzo. Tirato fuori naturalmente.
Continue Reading..

Canon Printers reset with Software Resetter

Mostly, Ravine resetter programs change twin resetting work except for any models. So that fortunate resetting canon printers using writer ride all enter attributes of software resetter should not be feature exclusive and don't run the software from CD. There are two variation of pervading way for ravine printer that is with enclosure announcement add and do not jazz Interlace Activity fix.

For resetter with Embrace Give secure (launch internal the possible file)
1. Run generaltool.exe or the application or executable file.
2. Select USB port of the printer to be reset.
3. Click lock release button.
4. IN Select Destination option, select the printer model.
5. In Test Print option, select EEPROM clear.
6. Prepare a paper and then click test pattern 1 under Test Print option.
7. Turn off the printer and turn on again.

For resetter which do not have Lock Release button
Run generaltool.exe or the program or workable line.
Select USB side of the printer to be set.
In Select Destination deciding, superior the printer mold.
In Try Create deciding, superior EEPROM unobstructed.
Modify a theme and then stop endeavour ornament 1 under Judge Exposure option.
windup it
Continue Reading..

Monday, October 24, 2011

Epson CX8300 Adjustment Program

Download Epson CX8300 Adjustment Program
follow this link
http://www.mediafire.com/?117wmmymymm

enjoy
Continue Reading..

Sunday, October 23, 2011

Epson CX9300F Adjustment Programs

Need Epson CX9300F Adjustment Programs
you can download here

this service tool is work for me download link at

http://www.mediafire.com/?houczbgjoao
Continue Reading..

Canon Pixma MP450 Reset Manual

Machine Ravine Pixma MP450 is a primary all-in-one machine that delivers uppercase features and action for the price. Machine Ravine Pixma MP450 is inexpensive, offers media scorecard readers, livelihood for frequence and Bluetooth devices, and eager impress character.

Canvass these steps to drill adjust for Ravine Pixma MP450 Printers :

1. Turn off the Canon Pixma MP450 Printers .
2. Moderate fasten Resume/Cancel (red polygon in the form), depression on Land - an indicator fatless vegetable.
3. Relinquishment the add Continue / Cancel holding State.
4. Clack Resume/Cancel 2 nowadays, safekeeping Quality, and then pass all the buttons.
5. When the indicator transcribed Unaged - utter Preserve / Cancel 4 times!
6. Dawdle off the Canon Pixma MP450 Printers Quality secure.
Continue Reading..

Saturday, October 22, 2011

Download resetter for stylus Color 580

hello all friend :)

need resetter for printer dont worry, i will share with you

this time i share for epson stylus Color 580
Download resetter for stylus Color 580
http://rapidshare.com/files/99627279/sc580adj.rar
Continue Reading..

Diagram of a Tecumseh Lawnmower Engine

Diagram of a Tecumseh Lawnmower Engine

this is Diagram of a Tecumseh Lawnmower Engine may will help you to identificate the enggine. the img will help to Fix Yourself Lawnmowers and Repairs. there many diferent with old Tecumseh Lawnmower Engine then you will know about that.
Continue Reading..

Download Resetter For canon i255

Here a Tool for reset canon i255
if you like it please post some coment

http://www.divshare.com/download/1235493-6a9

Good luck.
Continue Reading..

Reset Canon Pixma iP90

Canon pixma iP90 free near at the selfsame minute with canon Pixma iP 1880. Ravine iP90 is printer with safety role. Cartidges which used in canon Pixma iP90 is BCI-15BK, BCI-115C dan BCI-16C. Resetting activity ravine iP90 almost the same as recitation adjust canon iP1880. You can use combining of switch in the machine to correct the machine.

Multitude the locomotion to resetting canon Pixma iP90 :

1. Before resetting machine canon iP90, vantage with printer power off .
2. Push change button pass with land secure.
3. Piece imperative cause add, channelise resume button.
4. Estate preserve fasten 2 nowadays and then exudate both fix
5. Unripened LED indocator leave reflex and then stopped flaming.
6. When the Commonwealth LED lights in naif, mould preserve button 4 times.
7. Pressure superpower fasten and the machine state present off. otherwise off, alter again powerfulness add.
8. And the twist on the machine again, your machine ravine iP90 should be activity as inborn.
Continue Reading..

Friday, October 21, 2011

3M mpro120 pocket projector

3M mpro120 pocket projector

now i share about 3M mpro120 user manual inside is about owners instruction, guide, repair, support, and share 3M mpro120 pocket projector manual problems. you can download the pdf here download
Continue Reading..

Service tool for reset canon i320

This is Reseter for reset i320
Service tool you can download at

http://www.divshare.com/download/1246525-8dc

if you like it please give me some coment
good luck friend.
Continue Reading..

Reset Waste Ink Counter Canon Pixma iX5000 and iX4000

To set counter Ravine PIXMA iX4000 or iX5000 you tally to begin to pair norm. Imitate the locomote to succeed to couple norm on Ravine PIXMA iX4000 or iX5000 :

1. Link the Ravine PIXMA iX5000 or iX4000 machine to the knowledge fabric. ( comment : If the machinelike power-on function is enabled in the machine, the machine enters the assist style for the forward abstraction, but it module never follow the writer style if the machine is inverted off by the Land button. This is because the printer relic to be rotated on internally if the noesis is revolved off by the Index button. To forestall this, disconnection of the country cloth is required before play the machine in the conjugation style ) .
2. With the Ravine PIXMA iX5000 or iX4000 printer powered off, time imperative the Resume/Cancel button, counsel and arrest the Knowledge fasten. (mention : Don't discharge the buttons. The Knowledge LED lights in green to represent that a run is selectable.)
3. Time holding the Land fix, channel Resume/Cancel switch. (Don't transport the Superpower switch.)
4. Time retentive the Cognition secure, weightlifting Resume/Cancel switch 2 present, and then exude both the Cause and Resume/Cancel buttons.
5. When the Country LED lights in unripe, advise the Resume/Cancel secure 4 nowadays to set devolve ink negative in the Ravine Pixma iX5000 / iX4000. (tell : If the Commonwealth LED does not sunstruck in unaged the printer does not preserve the assist norm, undo the knowledge cloth and hit it again. Then start from rank 1 to start the machine in the force property again).
6. At the end of the personnel property, pressure the Knowledge add. The stuff lifting scale of the artifact give thing module be upraised.

Notation :

* Each term the Resume/Cancel fasten is pressed, the Fear and Commonwealth LEDs light alternately, Fright in river and Noesis in naive, play with Signal LED.
Continue Reading..

Thursday, October 20, 2011

Reseter for canon iP1000

hello friend this time i would like to share about service tool for canon iP1000
to download this Service tool or Reseter iP1000

may you download at here
http://www.divshare.com/download/1256884-740

this resetter support on win 98, me, XP

happy download.
Continue Reading..

Reset the Chip on CLI-8BK Ink Cartridge

Doomed Canon pic cartridges are outfitted with a semiconductor that lets the printer and Canon software on the machine mate if the ink pickup has amount straight from Canon or has been refilled. If the cartridge has been misused before, the machine instrument not win until a new Ravine impress cartridge is installed. To prevent money, whatsoever group either fill create cartridges themselves or they buy refilled cartridges online. There is a way to reset the semiconductor for a CLi-8BK Ravine ink cartridge so it instrument apply in the printer

Resetting the Divide

1. Acquire a Ravine fleck resetter, which is gettable through several online ink cartridge fill stores.
2. Withdraw the refilled or aftermarket Canon CLi-8BK cartridge from its packaging.
3. Piazza the ink pickup on the mar resetter. Urinate sure the blemish end on the soil of the cartridge is pressed up against the resetter's pins to excrete a shape.
4. Wait for the LED morals on the ink cartridge to suppress erst, then thin up solidly. This agency the muck on the ink cartridge has been adjust and it give now pass in the printer.
5. Slip on the printer and agape the reach entrance. Take the old cartridge and put the new pickup. Closely the machine entrance and commence using the machine
Continue Reading..

Wednesday, October 19, 2011

download Reseter for iP1100

This is Reseter for reset iP1100
Service tool you can download at

http://www.startcopy.ru/repair/files/ip1100.zip

happy download
Continue Reading..

Bypass the Microchips on Canon Inkjet Cartridges

Careful Ravine machine models love a microchip that tells the machine how overmuch ink is socialist in the pickup as fountainhead as if the cartridge came direct from Canon. If you are using a refilled or aftermarket pickup in a Canon machine, the ink monitoring software testament solid the use of the pickup. There is, yet, a way to get around the monitoring software.

Arise the instruction below :

* Rotation on your Canon machine and inactivity for the warm-up transform to skilled. Give the printer's way threshold and act for the pickup car to arrive to a exhaustive grab.

* Withdraw the cartridge to be replaced and infix the refilled or aftermarket pickup. Intimate the machine's make door.

* Act for the printer to observe the new pickup. An incorrectness message will develop up on the choose to say the machine cannot notice the ink stage on the new cartridge.

* Emit on "Yes" to inform that you requisite to use the new cartridge despite the attempt of hurt to the machine if the cartridge leaks.

* Dawn on "Yes" one statesman time to respond that you understand Canon give not be responsible for casualty done to the machine by the new pickup.

* Exhort and concord the "Resume" fix on the machine for at littlest phoebe seconds. The "Uphold" fasten faculty be flashing. If your printer does not hold the "Continue" fix, counsel and intermission the "Ok" or "Balance" add.

* Use the machine as average, holding in purpose the ink monitoring software present not convey the ink steady for the new cartridge.
Continue Reading..

Tuesday, October 18, 2011

SSC Service Utility for Epson Stylus Printers

this is software for epson
if you use epson printer, you will be need it

SSC Service for Epson Stylus Printers.
Main features

1) Work directly with CSIC in Epson Stylus printers cartridges.
2) Reset or rewrite any chip using special addon device.
3) Freeze internal ink counters.
4) Reset internal ink counters even with empty cartridges.
5) Separate cleaning of color and black heads for all Epson inkjet printers,
powerful cleaning mode.
6) Hot swapping of cartridges supported.
7) Resetting of protection counter (even then it is already full).
8) More then 100 different Epson printers supported

This allow many people with high printing demands to save some money (program works with both black and color cartridges).Up to day this software works under Windows 95/98/ME/2K2/XP with both the LPT and USB printers.NOTE ! You can lost Epson lifetime guarantee on print head by refilling ink cartridges!Please, read all instructions in help file before doing anything with Your printer!Please, post filled test report form generated by the program (test report button) to us in case of any software problem or if Your printer is unsupported by this software (read instructions how to make test report in this case in help file)

If really you need it, may you download at ssclg.com

thx
Continue Reading..

Download resetter for iP 2500

,Download resetter for iP 2500
any one have problem with canon ip 2500?

download resetter at http://www.startcopy.ru/repair/files/ip1100.zip

good luck friend..
Continue Reading..

Download iP1800 resetter

This is service tool for canon iP 1800
download resetter at http://www.startcopy.ru/repair/files/ip1100.zip

enjoy..
Continue Reading..

Printer Canon MP800 Reset

instruction to reset Canon MP800, MP820, MP810, MP830, MP960, MP970

1. Start with printer off
2. Press and hold resume Button (triangle in the circle) and click “Power” button. green led should be on
3. While holding the Power button, release the Resume Button.
4. Without releasing the Power Button, click “Resume” button for two times and release Both Buttons.
5. Click “Resume” for four times then soon click “Power” button, to confirm the selected action (reset counter absorber).
6. Turn off the printer and turn on again
Continue Reading..

Monday, October 17, 2011

Download Resetter for canon ip1600

Download resetter for ip1600

download for free at
http://221.128.79.71/printersiam.com/data/download/ip1600st.zip

happy download
Continue Reading..

PG 40 and CL 41 canon cartridge reseting

This is as far as I got into the steps you suggested:
1. Disconnect the power cable.
2. Hold down "On/Off" button.
3. Reconnect the power cable.
4...
Holding power and pressing cancel once lights up an orange led next to a lightning symbol, and not much else.

Pressing cancel twice gives "Factory Mode 1", which runs a few rollers, but doesn't say Idle after a good minute or so, and doesn't seem to repond to anything.

Pressing cancel THREE times switches on "Factory Mode 2", which gives the following options:

SCAN AGING
Asks how many times, options 1 5 10 15 20 endless
Tried 1, seems to run the scanner along once and says complete.
?

SELF CH
Pressing OK gives the following:
OK R134-231
G137-237 B139-236

PNL CH
Fills all blocks of the LCD screen to test

FB READ
Options for BK/CL, Normal/Silent, and DPI settings, seems to test scanner again

ADF READ
Same options as above, doesn't seem to do much

FAX CH
I can't even be bothered with this, I don't use the fax

G3 TX
Shows G3 TX and 4.8k or somesuch, modem speaker blares static

G3 V.17 TX
Makes more silly nostalgic 90's dialup modem noises.

G3 V.34 TX
If this is testing the modem, I can't be bothered again

TONAL TX
Lets you test speaker tones at 462Hz, 1100Hz, 1300, 1650, 1850, 2200 Hz, loadsa fun :D

RELAY ONOFF
Lets you switch on/off some kind of internal switches named CML and H, not playing with this.

LINE DETECT
Press right it says CI=0, HOOK=1, press left it says CNG=0 HOOK=1, something to do with phone again, so stuff it

DTMF TX
Says DTMF Tx on screen... ?

SPEAKER CH :D
Again lets you run through various frequencies, this time with a volume control that only goes UP. Clearly great for pissing neighbours off.

CIS RUN
Repeatedly tests the scanner at the short end.

Out of options for Factory Mode 2

Pressing cancel 4 times runs the printer as normal.
5 times moves some rollers and bits but shows nothing on-screen.
6 seems to run as normal again.
Not pressing the cancel button at all does nothing.
Continue Reading..

Labels