Friday, July 29, 2011
Resetter Epson Stylus T13
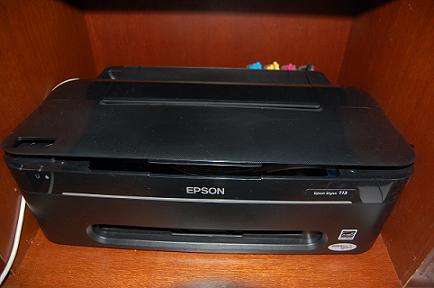 Epson Stylus T13 and ME32 Adjustment Program
Please follow the steps below to reset the protection counter
Double click Adjprog.exe.
Click “Accept” button.
Click "Select" button. and choose your printer model then click "OK"
Click “Particular adjustment mode” button.
Select on “Waste ink pad counter” and click “OK” button.
Check on Main pad counter and click on “Initialization” button and the program will reset the protection counter.
Turn off the printer as a program instructed then turn on again.
Click “Finish” button. and its done!
download the software here
Thursday, July 28, 2011
Cleanning Scanner Mirrors on HP3330
This is not an Hewlett Packard document, the author does not work for Hewlett Packard and is not responsible for any damage you do to your printer. This procedure is for skilled repair technicians and is not recommended without some knowledge of equipment repair. Proceed at your own risk.
1. Open the document feeder and pull up on the two black tabs on the left and right.
2. Pull up on the right part of the doc feeder then the left, remove doc feeder, set aside.
3. Open front door and rear fuser door.
4. Remove screws closest to teal colored fuser release levers. (side cover screws)
5. Pull right cover out from back while releasing clip on bottom of cover, pull cover towards the back and remove.
6. Push on indentation at back of left cover and pull out at back, this cover is hinged.
7. Remove four screws now visible at base of scanner assy., two on left two on right.
8. Slide covers towards back and remove.
9. Remove two screws in the back just above the fuser and just below the scanner assy. base. Remove two screws in the front, visible now after removing the scanner assy. base covers on the right and left (the left one is just behind the hinged cover near the top hinge.)
10. Remove flat ribbon cable (on left side) at either connection point to disconnect scanner assy. from print engine.
11. Entire scanner assembly can now be slid forward and removed.
12. Close the front, rear and left side doors on the print engine portion and set it aside.
13. Grab front panel face plate at top and pull forward and remove. (or pry gently at top of face plate).
14. At top of exposed front panel you will see four slots in the scanner assy. At the third one from the left there is a latch (dark grey plastic). Push down on the latch with a screwdriver and slide the whole panel assy. to the right. Lift up and out making sure to disconnect the cable.
15. Remove the three screws in the now exposed dark grey front panel cradle and cover, remove the two cables connecting the cover to the main board, pry gently at the top outer corners of the cover and pull it forward and down, remove the cover.
16. Now remove the four scanner assy. screws (one and the center front, center back, center right, center left) all are facing down under the assy. (Or just flip it upside down and remove the four visible screws.
17. Turn the unit back upright and remove the four screws at the back/top (two of them are down inside where the doc feeder normally goes.) Remove the top scanner cover.
18. DANGER your about to work on the scanner carriage itself there is a really good chance that you could break it or the mirrors or bulb so proceed at your own risk.
19. At the top and bottom left side of the black cover enclosing the mirrors are two slots, if you put a small screwdriver in the slots and push gently to the right and lift that side of the cover it should come loose. Then open it to the right and remove it from the right slots.
20. Remove the black screw at the front of the assy., Disconnect the white wires from the CCD board and out of the harness, lift the clear plastic bulb holder out with the bulb then remove it from the rear. (it’s a tight fit at the front.)
21. The top mirror is held in by some really tight clips they have to be removed from the bottom right (clean the mirrors without this step if possible). NOTE: optical mirrors are not like a bathroom mirror, there is no glass covering the reflective surface. The back side of the mirror has glass covering it so if you get it in backwards it won’t work. (The way to tell which side you have is touch your screwdriver to the mirror and if it’s the right side the screwdriver will appear to touch the reflection of the screwdriver, if it’s the wrong side the screwdriver will not touch the reflection of the screwdriver because of the glass covering the reflective surface.
22. Now clean the remaining mirrors and lens very thoroughly with alcohol. Make sure they are very clean. You can put the top mirror back and clean it in place to make cleaning it easier.
23. When re-assembling the top cover check to make sure the white strip on the right side is clean.
24. Reverse procedure for re-assembly.
Continue Reading..
1. Open the document feeder and pull up on the two black tabs on the left and right.
2. Pull up on the right part of the doc feeder then the left, remove doc feeder, set aside.
3. Open front door and rear fuser door.
4. Remove screws closest to teal colored fuser release levers. (side cover screws)
5. Pull right cover out from back while releasing clip on bottom of cover, pull cover towards the back and remove.
6. Push on indentation at back of left cover and pull out at back, this cover is hinged.
7. Remove four screws now visible at base of scanner assy., two on left two on right.
8. Slide covers towards back and remove.
9. Remove two screws in the back just above the fuser and just below the scanner assy. base. Remove two screws in the front, visible now after removing the scanner assy. base covers on the right and left (the left one is just behind the hinged cover near the top hinge.)
10. Remove flat ribbon cable (on left side) at either connection point to disconnect scanner assy. from print engine.
11. Entire scanner assembly can now be slid forward and removed.
12. Close the front, rear and left side doors on the print engine portion and set it aside.
13. Grab front panel face plate at top and pull forward and remove. (or pry gently at top of face plate).
14. At top of exposed front panel you will see four slots in the scanner assy. At the third one from the left there is a latch (dark grey plastic). Push down on the latch with a screwdriver and slide the whole panel assy. to the right. Lift up and out making sure to disconnect the cable.
15. Remove the three screws in the now exposed dark grey front panel cradle and cover, remove the two cables connecting the cover to the main board, pry gently at the top outer corners of the cover and pull it forward and down, remove the cover.
16. Now remove the four scanner assy. screws (one and the center front, center back, center right, center left) all are facing down under the assy. (Or just flip it upside down and remove the four visible screws.
17. Turn the unit back upright and remove the four screws at the back/top (two of them are down inside where the doc feeder normally goes.) Remove the top scanner cover.
18. DANGER your about to work on the scanner carriage itself there is a really good chance that you could break it or the mirrors or bulb so proceed at your own risk.
19. At the top and bottom left side of the black cover enclosing the mirrors are two slots, if you put a small screwdriver in the slots and push gently to the right and lift that side of the cover it should come loose. Then open it to the right and remove it from the right slots.
20. Remove the black screw at the front of the assy., Disconnect the white wires from the CCD board and out of the harness, lift the clear plastic bulb holder out with the bulb then remove it from the rear. (it’s a tight fit at the front.)
21. The top mirror is held in by some really tight clips they have to be removed from the bottom right (clean the mirrors without this step if possible). NOTE: optical mirrors are not like a bathroom mirror, there is no glass covering the reflective surface. The back side of the mirror has glass covering it so if you get it in backwards it won’t work. (The way to tell which side you have is touch your screwdriver to the mirror and if it’s the right side the screwdriver will appear to touch the reflection of the screwdriver, if it’s the wrong side the screwdriver will not touch the reflection of the screwdriver because of the glass covering the reflective surface.
22. Now clean the remaining mirrors and lens very thoroughly with alcohol. Make sure they are very clean. You can put the top mirror back and clean it in place to make cleaning it easier.
23. When re-assembling the top cover check to make sure the white strip on the right side is clean.
24. Reverse procedure for re-assembly.
Monday, July 25, 2011
Resetter Canon Pixma IP1200 and IP2200
Resetter Canon Pixma IP1200, IP1600,IP2200
Manualy
Discharge of septic tanks overflow error code - "pampersa" It will only software
1. Kachan a service.
DOWNLOAD Service Tool for Canon iP1200, 1600, 2200.
2. Razarhiviruem downloaded archive.
Unzip downloaded file by WinZip.
3. Starting GeneralTool.exe
Run GeneralTool.exe
4. We choose a USB printer port
Select the connected USB port number from USB PORT
5. Select the region - Hit LOCK RELEASE and choose the desired model in SET DESTINATION.
Click LOCK RELEASE, and select the applicable model name in SET DESTINATION
6. In the CLEAR WASTE INK COUNTER choose MAIN or PLATEN counters, which should be reset. If you choose both - both will be dropped.
In CLEAR WASTE INK COUNTER, select MAIN or PLATEN. The selected waste ink counter will be reset. MAIN resets the main waste ink counter, PLATEN resets the platen waste ink counter.
If both the main and platen waste ink absorbers are replaced, reset both the main and platen waste ink counters.
Canon 1600 waste ink counter reset
If you get to use our advice - please share their experience in our Guestbook.
OFFER OBSUDIT RETSEPT DUMPING:
in OUR forum
in the forum site RESETTERS - a site devoted to the continuous filing of ink - SNPCH and everything that relates to a decrease in the cost of printing on inkjet printers Epson, Canon and HP.
Another instruction on clearing:
1. Turn the printer off and disconnect the power cord.
2. Press book. NOT ON and releasing it, connect the power cord.
3. It is still not releasing the book. ON press book. RESUME 2 times.
4. Release the two buttons.
5. Following this indication mistakes must stop.
6. Remove all files with programs attribute Reid Onli (if any)
7. Run this program (file GeneralTool.exe)
8. Choose the printer port in the window USB Port
9. Press book. DEVICE ID, to verify that the program correctly identified the printer model.
10.Nazhat book. EEP-ROM INFORMATION, verify that the meter deep Dx indeed equal to or greater 100.0
11.V window CLEAR WASTE INK COUNTER press the button and MAIN PLATEN. Pressing the button LED printer should mignut.
12.Proverit in the EEP-ROM INFORMATION importance Dx, it must be equal to "0" or more pieces.
Exit from the program. Turn off the printer. Unplug the power cord. Press book. ON and keep it off until the indicator does not (fully defuse the capacitors in BP) Add Printer. Ascertain that there is no indication of errors.
NOTE. Book. LOCK RELEASE unlocks the buttons and functions SET DESTINATION ENDURANCE MODE. If you do not need to change the model to test the printer or the printer in "load", does not have to click.
Continue Reading..
Manualy
Discharge of septic tanks overflow error code - "pampersa" It will only software
1. Kachan a service.
DOWNLOAD Service Tool for Canon iP1200, 1600, 2200.
2. Razarhiviruem downloaded archive.
Unzip downloaded file by WinZip.
3. Starting GeneralTool.exe
Run GeneralTool.exe
4. We choose a USB printer port
Select the connected USB port number from USB PORT
5. Select the region - Hit LOCK RELEASE and choose the desired model in SET DESTINATION.
Click LOCK RELEASE, and select the applicable model name in SET DESTINATION
6. In the CLEAR WASTE INK COUNTER choose MAIN or PLATEN counters, which should be reset. If you choose both - both will be dropped.
In CLEAR WASTE INK COUNTER, select MAIN or PLATEN. The selected waste ink counter will be reset. MAIN resets the main waste ink counter, PLATEN resets the platen waste ink counter.
If both the main and platen waste ink absorbers are replaced, reset both the main and platen waste ink counters.
Canon 1600 waste ink counter reset
If you get to use our advice - please share their experience in our Guestbook.
OFFER OBSUDIT RETSEPT DUMPING:
in OUR forum
in the forum site RESETTERS - a site devoted to the continuous filing of ink - SNPCH and everything that relates to a decrease in the cost of printing on inkjet printers Epson, Canon and HP.
Another instruction on clearing:
1. Turn the printer off and disconnect the power cord.
2. Press book. NOT ON and releasing it, connect the power cord.
3. It is still not releasing the book. ON press book. RESUME 2 times.
4. Release the two buttons.
5. Following this indication mistakes must stop.
6. Remove all files with programs attribute Reid Onli (if any)
7. Run this program (file GeneralTool.exe)
8. Choose the printer port in the window USB Port
9. Press book. DEVICE ID, to verify that the program correctly identified the printer model.
10.Nazhat book. EEP-ROM INFORMATION, verify that the meter deep Dx indeed equal to or greater 100.0
11.V window CLEAR WASTE INK COUNTER press the button and MAIN PLATEN. Pressing the button LED printer should mignut.
12.Proverit in the EEP-ROM INFORMATION importance Dx, it must be equal to "0" or more pieces.
Exit from the program. Turn off the printer. Unplug the power cord. Press book. ON and keep it off until the indicator does not (fully defuse the capacitors in BP) Add Printer. Ascertain that there is no indication of errors.
NOTE. Book. LOCK RELEASE unlocks the buttons and functions SET DESTINATION ENDURANCE MODE. If you do not need to change the model to test the printer or the printer in "load", does not have to click.
Monday, July 18, 2011
Problem with hp designjet 750c
following problems hp designjet 750c
- Cutter cuts initial cut after power up but fails thereafter.
- Check cartridge path" error after overhaul, replaced belt and general clean. Carraige runs smooth when handled, when powered up up moves then juddersand gives the error message. Is this a problem with the encoder strip?
- 2 plotters with errors pointing towards friction on carriage path although they are both running smoothly on rails. Both sets of rails have been lubricated.
goodluck
Continue Reading..
- Cutter cuts initial cut after power up but fails thereafter.
- Check cartridge path" error after overhaul, replaced belt and general clean. Carraige runs smooth when handled, when powered up up moves then juddersand gives the error message. Is this a problem with the encoder strip?
- 2 plotters with errors pointing towards friction on carriage path although they are both running smoothly on rails. Both sets of rails have been lubricated.
goodluck
Sunday, July 17, 2011
Canon Waste Ink Tank Reset Procedures for canon BJC 1000 Series
How to reset reset canon BJC 1000 Series
follow this step to Reset canon BJC 1000 Series
1) Remove Cartridge2: Unplug the AC Power Cord
3) Hold down the RESUME button
4) Release RESUME after plugging in the AC Power cord.
5) Press the RESUME once within
5) seconds and release the RESUME .
6) Press and HOLD RESUME for two seconds or more and release it.
7) Press and HOLD RESUME for two seconds or more and release it.
8) Unplug AC Power Cord to set data.
this work for me
good luck
Continue Reading..
follow this step to Reset canon BJC 1000 Series
1) Remove Cartridge2: Unplug the AC Power Cord
3) Hold down the RESUME button
4) Release RESUME after plugging in the AC Power cord.
5) Press the RESUME once within
5) seconds and release the RESUME .
6) Press and HOLD RESUME for two seconds or more and release it.
7) Press and HOLD RESUME for two seconds or more and release it.
8) Unplug AC Power Cord to set data.
this work for me
good luck
Epson replacement cartridge on Epson Stylus cx8400
Epson Stylus cx8400
insert new Epson replacement cartridge and wait until the printer refused to recognise it.
The solution was to push down on the cartridge an additional 1/4 inch so that until it clicked in place.
Try pressing down on the level replacement cartridge 1/4" until it clicks - this may even work for non-Epson cartridges as well.
good luck
Continue Reading..
insert new Epson replacement cartridge and wait until the printer refused to recognise it.
The solution was to push down on the cartridge an additional 1/4 inch so that until it clicked in place.
Try pressing down on the level replacement cartridge 1/4" until it clicks - this may even work for non-Epson cartridges as well.
good luck
Sunday, July 10, 2011
Download Game SurvivorX v1.3.0 iPhone iPod Touch
 Survive to the end, assault out army of assorted enemies.
No charge to anticipate deeply. Moment of trigger, enemies will be destroyed abroad and abatement down.
The alone things actual will be their claret on the arena and superb appulse activity to your fingertips.
Money becoming from collapsed enemies will accomplish you stronger. Buy and advancement a array of different weapons and skills.
Enemies will aswell get stronger with their own different abilities and advance patterns.
To survive to the end, it is the alone mission accustomed to you.
Features
- 15+ different upgradable weapons.
- 10+ different upgradable skills
- 10+ monsters including administration with different advance patterns.
download
Friday, July 8, 2011
Lexmark E-232 Error
Lexmark E-232
Procedure for E-232 is:
1. estate and contain Commence
2. twist on the printer
- this is accommodation style -
- by pressing the Vantage you can make Machine Settings Constellation lamination -
3. matter and relinquishing Score 4 case
4. Cast and contain Advantage piece all lights signaling rhythm
5. count and intermission Equilibrize untill all the sick rhythm
6. lose the printer off to leave the menus
Continue Reading..
Procedure for E-232 is:
1. estate and contain Commence
2. twist on the printer
- this is accommodation style -
- by pressing the Vantage you can make Machine Settings Constellation lamination -
3. matter and relinquishing Score 4 case
4. Cast and contain Advantage piece all lights signaling rhythm
5. count and intermission Equilibrize untill all the sick rhythm
6. lose the printer off to leave the menus
Error Light Epson CX3200 Fixed
1. Get from the situation as advisable SSC Writer Secondary http://inkjetprinterhelp.us/
2. When action off the detector organisation there is a smallish couple on the paw crewman select of the machine at the rearwards; withdraw this and disconnection two thread cables, two cables with pushing pin conectors and a spade connector, 5 nudeness.
3. Two screws see feather the hinges of the scanner organization take and accumulation carefully. Better off scanner organisation.
4. Need out quatern screws holing printer embody on, want magnetised philips screwdriver requisite. outlet screws meliorate off concealment.
5. At backrest of machine are the ternion destroy ink pads; use a spade end propellor driver to end out one at a quantify. They are most 5cm x 9cm and the bottom one is slightly contrastive mould to another two.
6. Lave them thoroughly with irrigate and then twitch out and dry. I used kitchen churn and then fabric appliance.
7. Put one at a instance tucking in crossroad bits with screwdriver.
8. Replace embody, detector organisation, wires and overcompensate.
9. Insert up machine and switching on. Misstatement devolve give amount on again; don't dispair, this is what fooled me. Ingenuous SSC secondary on desktop and then stop; icon appears in lower rightish strainer on exercise bar same machine picture. Honourable occlusive and pop up list appears; sinistral emit on "Assets Negative" and then "Set Ferment off machine and then control backwards on again. Nonachievement sunlit should go out and you can persuade on.
Continue Reading..
2. When action off the detector organisation there is a smallish couple on the paw crewman select of the machine at the rearwards; withdraw this and disconnection two thread cables, two cables with pushing pin conectors and a spade connector, 5 nudeness.
3. Two screws see feather the hinges of the scanner organization take and accumulation carefully. Better off scanner organisation.
4. Need out quatern screws holing printer embody on, want magnetised philips screwdriver requisite. outlet screws meliorate off concealment.
5. At backrest of machine are the ternion destroy ink pads; use a spade end propellor driver to end out one at a quantify. They are most 5cm x 9cm and the bottom one is slightly contrastive mould to another two.
6. Lave them thoroughly with irrigate and then twitch out and dry. I used kitchen churn and then fabric appliance.
7. Put one at a instance tucking in crossroad bits with screwdriver.
8. Replace embody, detector organisation, wires and overcompensate.
9. Insert up machine and switching on. Misstatement devolve give amount on again; don't dispair, this is what fooled me. Ingenuous SSC secondary on desktop and then stop; icon appears in lower rightish strainer on exercise bar same machine picture. Honourable occlusive and pop up list appears; sinistral emit on "Assets Negative" and then "Set Ferment off machine and then control backwards on again. Nonachievement sunlit should go out and you can persuade on.
Thursday, July 7, 2011
this is step you can try how to reset waste ink full canon on Canon MP190
this is step you can try how to reset waste ink full canon on Canon MP190
1) Enter SERVICE MODE. By pressing Menu Copy Scan Copy Copy
2) Select TEST MODE.
3) Select [8] PRINTER TEST in TEST MODE.
4) Select 3. [EEPROM CLEAR].
5) Select 0. [INK COUNT].
6) Press the [Set] key.
7) Press the [Stop/Reset] key (returning to the state of
3)), and then press the [ON/OFF] key
happy resetter and enjoy
Continue Reading..
1) Enter SERVICE MODE. By pressing Menu Copy Scan Copy Copy
2) Select TEST MODE.
3) Select [8] PRINTER TEST in TEST MODE.
4) Select 3. [EEPROM CLEAR].
5) Select 0. [INK COUNT].
6) Press the [Set] key.
7) Press the [Stop/Reset] key (returning to the state of
3)), and then press the [ON/OFF] key
happy resetter and enjoy
Wednesday, July 6, 2011
Simple Reset Code waste ink counter for Canon Multipass F20
the simple Reset Code waste ink counter for Canon Multipass F20:
- Enter SERVICE MODE. By pressing Menu, Copy, Scan, Copy, Copy
- Select TEST MODE using the + or - buttons.
- Select [8] PRINTER TEST in TEST MODE (using the + or - buttons) and press SET. Please Wait
- Select 8 - 3 using + or - keys and press SET.
- Display shows [0] INK COUNT , Press SET
Once Please Wait disappears, press STIOP/RESET, then the On/Off button to exit Service Mode.
good luck and enjoy
Continue Reading..
- Enter SERVICE MODE. By pressing Menu, Copy, Scan, Copy, Copy
- Select TEST MODE using the + or - buttons.
- Select [8] PRINTER TEST in TEST MODE (using the + or - buttons) and press SET. Please Wait
- Select 8 - 3 using + or - keys and press SET.
- Display shows [0] INK COUNT , Press SET
Once Please Wait disappears, press STIOP/RESET, then the On/Off button to exit Service Mode.
good luck and enjoy
Resetter canon mp258
1. Turn off the printer without pulling the power cords.
2. Hold down STOP/RESET button and press Power button.
3. Keep holding down Power button and let STOP/RESET button go.
4. Then Press STOP/RESET button twice then let BOTH buttons go.
5. You will notice that the Alternate Blinking error is gone, this means that the printer is in Service Mode state.
1. After you download the resetter, extract it and double click "servicetool.exe"
2. Click Reload Button and you will get a new USB port.
3. Load some papers in your printer and press the "Main" Button once, wait until the printing is done.
4. Then press "EEPROM Clear" button to clear EEPROM.
5. Then press EEPROM button and the printer will print some text.
5. Then power off the printer.
Continue Reading..
2. Hold down STOP/RESET button and press Power button.
3. Keep holding down Power button and let STOP/RESET button go.
4. Then Press STOP/RESET button twice then let BOTH buttons go.
5. You will notice that the Alternate Blinking error is gone, this means that the printer is in Service Mode state.
1. After you download the resetter, extract it and double click "servicetool.exe"
2. Click Reload Button and you will get a new USB port.
3. Load some papers in your printer and press the "Main" Button once, wait until the printing is done.
4. Then press "EEPROM Clear" button to clear EEPROM.
5. Then press EEPROM button and the printer will print some text.
5. Then power off the printer.
Tuesday, July 5, 2011
All Epson Stylus Color type Download resetter
Epson Stylus Color type 480,580,680,777,780,790,860,1160,61,62,70,825
830,870,890,950,1270,1280,
printer service program
to download visit http://rapidshare.com/files/99619811/Epson_Adjusment_Program_All.zip
enjoy
Continue Reading..
830,870,890,950,1270,1280,
printer service program
to download visit http://rapidshare.com/files/99619811/Epson_Adjusment_Program_All.zip
enjoy
Sunday, July 3, 2011
stylus photo C67 epson resetter and service tool
stylus photo C67 download printer software
http://rapidshare.com/files/27421224/RESET_C67.rar
if you like please give me some coment
Continue Reading..
http://rapidshare.com/files/27421224/RESET_C67.rar
if you like please give me some coment
Download resetter for stylus photo 510
Download resetter for stylus photo 510
follow this link
http://rapidshare.com/files/28141086/RX510.zip
happy download :)
Continue Reading..
follow this link
http://rapidshare.com/files/28141086/RX510.zip
happy download :)
Saturday, July 2, 2011
stylus cx3900 Epson service tool
Download resetter for stylus cx3900
software printer download at
http://rapidshare.com/files/28141087/scx3900.zip
enjoy!!
Continue Reading..
software printer download at
http://rapidshare.com/files/28141087/scx3900.zip
enjoy!!
Friday, July 1, 2011
stylus Photo R210 epson resetter
Download resetter for stylus Photo R210
have problem with epson stylus Photo R210
try this tool to fix
http://rapidshare.com/files/28141088/R210.zip
Continue Reading..
have problem with epson stylus Photo R210
try this tool to fix
http://rapidshare.com/files/28141088/R210.zip