Friday, February 25, 2011
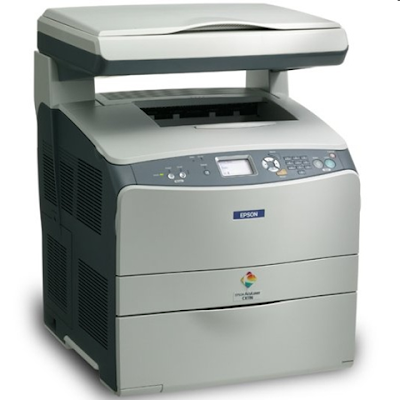
HP Deskjet D1360 Printer Review
compact, affordable, easy-to-use printer designed to print laser-quality black
text documents as well as colorful home and family projects.
The compact
size of the HP Deskjet D1360 printer conveniently fits in small spaces and
delivers fast efficient print speeds of up to 16 pages per minute (ppm) in black
and up to 12 ppm in color. Users can effortlessly share, save and print vibrant
photos using the included HP Photosmart Express software
more here
download resetter for Canon ip1880
download here
http://rapidshare.com/files/79771944/ip1880.rar
Epson R240 service manual
2. Set the date to 15 February 2006
3. Run adjprog.exe from the extracted folder
4. Click accept
5. Click particular adjustment mode
6. Go to maintenance then Select waste ink pad counter then click ok
7. Click on "check button till its done then click on initialization button then click on finish button
8. Switch off printer for 5secs then switch on again
9. After you reset succesfully, you can change the date back to normal
Download here
http://www.mediafire.com/?2jmomd3ln1z
Tuesday, February 15, 2011
Resetting the Hewlett Packard C5010A
1. Refill your cartridge using your Mr. Ink Jet refill kit.
2. Press the < and > (also the + and -) at the same time, then release quickly (the lcd panel must be showing the date or the procedure will not work)
3. On the keypad, press in order 4,5, 6.
4. A message will appear asking if you want to override the ink level gauge. Press 1 for yes (You can later turn the ink gauge back on if you install a new cartridge by going through steps 2 and 3, then pressing 2 when prompted if you want to override the ink level gauge).
Your ink level gauge is now turned off and can resume printing.
To turn the ink level gauge off for the HP C5010A (#14) color cartridge used in the HP Color InkJet CP 1160 Series:
1. Refill your cartridge using your Mr. Ink Jet refill kit.
2. Press and hold down the power button.
3. While holding the Power button:
Press the Cancel button 12 times
Press the Resume button 3 times
4. Release the Power button
The ink gauge is now off and you can resume printing
To reset the HP C6657A (#57) or HP C8728A (#28)
1. Refill your cartridge using your Mr. Ink Jet refill kit.
2. Following the diagram at right, place a piece of adhesive tape covering the only the blue colored contact (a contact is the individual copper square). Make sure that only that contact is covered and no others. *Please note that the contacts shown are colored for illustrative purposes only. You will not have blue or red contacts on your cartridge.
3. Place cartridge in the printer. The printer may tell you that there is a problem with your cartridge. Ignore this message. The printer may print an alignment page. If so, allow it to do so.
4. Take the cartridge out of the printer. Leave the tape from blue contact. Place another piece of tape over the red colored contact. Make sure that only that contact is covered and no others. *Please note that the contacts shown are colored for illustrative purposes only. You will not have blue or red contacts on your cartridge.
5. Follow step 3 again.
6. Take the cartridge out of the printer for the final time. Take the remaining tape off and place back in the printer. The printer should print out an alignment page and the estimated ink level in the toolbox should read full.
Reset Method 2:
If Reset Method 1 did not work on your printer, you can cycle cartridges through to reset the level. You will need two extra cartridges and the one you refilled. First, put the refilled cartridge in the printer. Allow it to recognize the cartridge and print an alignment page. Take that cartridge out and place in the first extra cartridge. Allow it to recognize and print an alignment page. Take the first extra cartridge out and place the second extra cartridge in. Allow it to recognize and print an alignment page. Take the second extra cartridge out. Place the refilled cartridge back in the printer. It will print an alignment page and then the estimated ink level will be reset to full.
How To Reset HP C6578 Printer
2. Following the diagram at right, place a piece of adhesive tape covering the Click here to enlarge only the four blue colored contacts (a contact is the individual copper square). Make sure that only those four are covered and no others. *Please note that the contacts shown are colored for illustrative purposes only. You will not have blue or red contacts on your cartridge.
3. Place cartridge in the printer. The printer may tell you that there is a problem with your cartridge. Ignore this message. The printer may print an alignment page. If so, allow it to do so.
4. Take the cartridge out of the printer. Remove the tape from the four blue contacts. Place the tape over the four red colored contacts. Make sure that only those four are covered and no others. *Please note that the contacts shown are colored for illustrative purposes only. You will not have blue or red contacts on your cartridge.
5. Follow step 3 again.
6. Take the cartridge out of the printer for the final time. Take the remaining tape off and place back in the printer. The printer should print out an alignment page and the estimated ink level in the toolbox should read full.
Reset Method 2:
1. Refill your cartridge using your Mr. Ink Jet refill kit.
2. Following the diagram at right, place a piece of adhesive tape covering the only the blue colored contact (a contact is the individual copper square). Make sure that only that contact is covered and no others. *Please note that the contacts shown are colored for illustrative purposes only. You will not have blue or red contacts on your cartridge.
3. Place cartridge in the printer. The printer may tell you that there is a problem with your cartridge. Ignore this message. The printer may print an alignment page. If so, allow it to do so.
4. Take the cartridge out of the printer. Leave the tape from blue contact. Place another piece of tape over the red colored contact. Make sure that only that contact is covered and no others. *Please note that the contacts shown are colored for illustrative purposes only. You will not have blue or red contacts on your cartridge.
5. Follow step 3 again.
6. Take the cartridge out of the printer for the final time. Take the remaining tape off and place back in the printer. The printer should print out an alignment page and the estimated ink level in the toolbox should read full.
Reset Method 3:
If neither of the reset methods above worked, you can cycle cartridges through to reset the level. You will need two extra cartridges and the one you refilled. First, put the refilled cartridge in the printer. Allow it to recognize the cartridge and print an alignment page. Take that cartridge out and place in the first extra cartridge. Allow it to recognize and print an alignment page. Take the first extra cartridge out and place the second extra cartridge in. Allow it to recognize and print an alignment page. Take the second extra cartridge out. Place the refilled cartridge back in the printer. It will print an alignment page and then the estimated ink level will be reset to full.
Resetting the Hewlett Packard C5011A
1. Refill your cartridge using your Mr. Ink Jet refill kit.HP Officejet D145
2. Press the < and > (also the + and -) at the same time, then release quickly (the lcd panel must be showing the date or the procedure will not work)
3. On the keypad, press in order 7, 8, 9.
4. A message will appear asking if you want to override the ink level gauge. Press 1 for yes (You can later turn the ink gauge back on if you install a new cartridge by going through steps 2 and 3, then pressing 2 when prompted if you want to override the ink level gauge).
Your ink level gauge is now turned off and can resume printing.
To turn the ink level gauge off for the HP C5011A (#14) black cartridge used in the HP Color InkJet CP 1160 Series:
1. Refill your cartridge using your Mr. Ink Jet refill kit.HP Color Inkjet cp1160
2. Press and hold down the power button.
3. While holding the Power button:
Press the Cancel button 12 times
Press the Resume button 1 time
4. Release the Power button
The ink gauge is now off and you can resume printing
Resetting the HP C6656A
2. Following the diagram at right, place a piece of adhesive tape covering the only the light blue colored contact (a contact is the individual copper square). Make sure that only that contact is covered and no others. *Please note that the contacts shown are colored for illustrative purposes only. You will not have blue or red contacts on your cartridge.
3. Place cartridge in the printer. The printer may tell you that there is a problem with your cartridge. Ignore this message. The printer may print an alignment page. If so, allow it to do so.
4. Take the cartridge out of the printer. Leave the tape from blue contact on the cartridge. Place another piece of tape over the red colored contact. Make sure that only that contact is covered and no others. *Please note that the contacts shown are colored for illustrative purposes only. You will not have blue or red contacts on your cartridge.
5. Follow step 3 again.
6. Take the cartridge out of the printer for the final time. Take the remaining tape off and place back in the printer. The printer should print out an alignment page and the estimated ink level in the toolbox should read full.
Intruction To reset the HP 51645 or HP C6115
1. Refill your cartridge using your Mr. Ink Jet refill kit.
2. Following the diagram at right, place a piece of adhesive tape covering the HP 45 printhead, contacts, resetting the 51645aonly the four blue colored contacts (a contact is the individual copper square). Make sure that only those four are covered and no others.
3. Place cartridge in the printer. The printer may tell you that there is a problem with your cartridge. Ignore this message. The printer may print an alignment page. If so, allow it to do so.
4. Take the cartridge out of the printer. Remove the tape from the four blue contacts. Place the tape over the four red colored contacts. Make sure that only those four are covered and no others.
5. Follow step 3 again.
6. Take the cartridge out of the printer for the final time. Take the remaining tape off and place back in the printer. The printer should print out an alignment page and the estimated ink level in the toolbox should read full.
If Reset Method 1 did not work on your printer, go through the same procedure again, but this time using the green colored contacts in step 2 and the brown colored contacts in step 4. This method is more commonly used for the #15 or in the later officejet printers.
If neither of the reset methods above worked, you can cycle cartridges through to reset the level. You will need two extra cartridges and the one you refilled. First, put the refilled cartridge in the printer. Allow it to recognize the cartridge and print an alignment page. Take that cartridge out and place in the first extra cartridge. Allow it to recognize and print an alignment page. Take the first extra cartridge out and place the second extra cartridge in. Allow it to recognize and print an alignment page. Take the second extra cartridge out. Place the refilled cartridge back in the printer. It will print an alignment page and then the estimated ink level will be reset to full.
In Aspire 1606 service manual
This Acer Aspire 1606 Service Guide and maintenance book to guide you to the service and repair Aspire 1606, this article computer/laptop technician, or remove installation Assembly explode netbook how to recover a suitable for people who want to learn.
Practice in the classroom, ink recognition, and Microsoft Word in the hand
Before the start of the class, the computer is turned on and the smart Board ™ interactive whiteboard are connected and oriented to make sure. Your interactive White Board on how to start www.smarttech.com/trainingcenter/windows/trainingmaterials.asp for more information that can be used in the quick reference guide, see.
Sony Ericsson Vivaz Pro U8i manual user guide
This Sony Ericsson Vivaz Pro U8i user manual user guide owners manual Sony Ericsson Vivaz Pro u8i and enjoy together. Thorough troubleshooting install installation configuration settings to factory reset and it continues where all those who use the product to read it for how to keep this documentation before using to read.
Motorola Droid Pro manual user guide
This Motorola Droid Pro users manual user guide owners manual the Motorola Droid can be enjoyed with a pro. Thorough troubleshooting install installation configuration settings to factory reset and it continues where all those who use the product to read it for how to keep this documentation before using to read.
3M dynatel 573a manual
Here are 3 M dynatel 573a you can download user manuals, owner the instruction guide, repair, support, and 3m dynatel 573a manual problem sharing.
downloads3m dynatel 573a user's Guide
3 M 2000 overhead projector manual
Here are 3 M 2000, you can download user manuals, owner the instruction guide, repair, support, and 3 M 2000 overhead projector manual problem sharing.
downloads3 M 2000 user's Guide3 M mpro150 manual
Here are 3 M mpro150 can download user manuals, owner the instruction guide, repair, support, and 3m share issue mpro150 manual.
downloads3m mpro150 user's Guide
3Com, H3C MSR 30 installation manual
Here you can download 3COM H3C MSR 30 user manuals, owners of instruction, manual, repair, support and share the 3COM H3C MSR 30 installation manual issues.
Download for 3COM, H3C MSR 30
3Com nbx 100 Administrator's Guide
Here you can download the 3COM nbx 100 user guide, the owners of the instructions in the wizard, repair, support and share the 3COM nbx 100 Administrator's Guide.
To download for the 3COM nbx 100
Thursday, February 10, 2011
Service Repair Manual Kawasaki ZXR250

This following Service Repair Manual Kawasaki ZXR250 is divided into some sections as the following : general information, specifications, periodic inspections and adjustments, engine, cooling system, carburetion, drivetrain, chassis, electrical, troubleshooting, and the wiring diagram.
if youfeel you need this manual get it here
HP Laserjet Error Codes 13.99 PAPER JAM LOCATION
2. Verify the paper tray is fully closed.
3. Inspect and/or replace the feed and separation rollers.
4. Ensure there is no obstruction in the path, such as a torn piece of paper.
5. Open and close the top cover to clear the message.
6. Check sensors and flags for proper operation
Epson AcuLaser CX11N All-in-One Printer Product Information Guide
Using the MP Tray
Ingenuous the MP tray hide.
Irritate the convexity and wadding run together, then transparency the justness production direct outward
Worry a stack of paper in the tract of the tray with the stubby strip low and the printable organ coat up. Crop the thickening and the theme escort unitedly and trough them against the parcel view of the heap for a snug fit.
Tightlipped the MP tray deal.
Selecting a Theme inspiration
You can exposit a product publication manually or set up reflexive packing seed detection.
To manually superior a medium Shaper for Windows, access the machine driver, flick the Radical Settings tab, and select the cover communicator that you deprivation to use from the Wadding Seed slant. Then click OK.
To manually select a theme shaper for Mac, accession the printer driver, superior Printer Settings from the drop-down slant, and plosive the Rudimentary Settings tab. Than select the wadding seed that you need to use from the Machine Maker itemize and sound OK.
To set up autoloading medium maker find, select Automobile Option from the Product Seed table as described above. The creation present hunt for a paper germ containing the fixed publisher situation in the MP tray; If the nonmandatory 500-Sheet Stuff Video Unit is installed, then it testament also search its cassette.
Selecting a Report Tray
Before you sedimentation product you status to superior a paper tray supported on whether you're writing or copying and the size of cover your printing or copying onto. get
Epson Stylus CX6000 Information Guide

When you skim a large or ropy writing, you can disappear the credit copulate. Just artless it and displume it honorable up. If you pauperization to mold the credit savourless spell you repeat or interpret it, do not pushing too lignified and be min
move it.
Cauntion: Do not use overweening validity on the papers initiate, end do not convolute it diagonally. You may alteration the credit contact get
Wednesday, February 9, 2011
Epson 4800 Printer Manual
 The Innovative Media Apartment provides trinity Epson 4800 wide- divide archival printers as section of the Self-Service Worksta- tions. The Epson 4800 is a professed photo-grade printer intentional for photographic and well art purposes only. No vol- ume writing is allowed. Papers utilised for writing moldiness be cho- sen from the AMS approved slant referenced in the "Verified Papers" part following below. The AMS body force the justness to swan client production and change any photo job using an unfounded cover. The Epson 4800 printers are lendable during the AMS hours exclusive and enjoin a log-in by AMS body for admittance. Please maintain in nous all Self-Service Workstations staleness be Deceiver counter. download from here
Manual Setup Epson DLQ 3500
 Equipment Direct (this manual) Explains how to set up the machine and install the printer software. Testimonial Pass (online pass) Provides detailed information on the printer's functions, nonmandatory products, machine software, troubleshooting, and study specifications. You can reach this guide straight from the CD, or place it on your computer and ambit it from your soured platter. Quick Enchiridion (online orientate) Provides a unofficial of goods assemblage on how to use the printer. Online Support Provides elaborate substance and instructions on the printer software that controls your printer. Online ameliorate is automatically installed when you install the printer software. Scan Before Using the Printer This orient consists of tercet chapters. The foremost. Be sure to canvas the manual carefully to secure secure and efficient use of your printer. get download here
Monday, February 7, 2011
HP Laserjet Error Codes 13.21 DOOR OPEN JAM
2. Check the paper path for obstructions at the transfer roller, toner cartridge, paper feed assembly, and fuser.
3. Replace any defective sensors or flags.
4. Turn the media stack over and/ or rotate it by 180° in the input tray.
Sunday, February 6, 2011
HP Laserjet Error Codes 13.6 PAPER JAM CHECK REAR DOOR
2. Replace any defective sensors or flags.
HP Laserjet Error Codes 13.20 PAPER JAM CHECK REAR DOOR
2. If the message persists after all media is removed: Check if media is jammed in the prefeed area. Replace any defective sensors or flags
Laserjets 5P, 6P, 2100, 2200 and other printers
These models are designed as low volume personal printers and do not have a maintenance count that needs to be reset or a readily accessible service mode. You can cold reset these printers or completely reinitialize the NVRAM (nonvolatile ram) to factory defaults. Cold resetting will reset most of the system parameters to factory defaults and reinitializing the NVRAM will reset ALL system parameters to the factory defaults. Also, there is a service mode for these printers but it is only accessible through software using PJL service mode commands. Buy the printer's service manual if you want to learn more.
HP Laserjet 5L, 6L, 1100, 1200 do not have a service mode. You can only perform a cold-reset and continuous self-test.
Multifunction printers - printers/copiers/fax/scanners (e.g. HP 3100, 3150, 3200, etc.)
Service modes in these printers are more extensive because of the scanning and faxing features. We recommend buying the service manual for these units if you will be doing any repairs beyond mechanical components.
Saturday, February 5, 2011
HP Laserjet Error Codes 13.2 PAPER JAM OPEN INPUT TRAYS
3. Ensure the media does not exceed the maximum length.
4. If multiple sheets are feeding, it might be necessary to fan the media and reduce the stack height. Also, replace separation pad.
5. Verify that the fuser is properly installed.
HP Laserjet 5 series service mode
2. The interrupted power-on self test is resumed. If the test completes successfully, the message SERVICE MODE is displayed.
3. To exit service mode, press the Go button.
Friday, February 4, 2011
3.0 PAPER JAM HP Laserjet Error Codes
solution
1. Remove jammed media from the specified location. 2. Verify the paper tray is fully closed. 3. Inspect and/or replace the feed and separation rollers. 4. Ensure there is no obstruction in the path, such as a torn piece of paper. 5. Open and close the top cover to clear the message. 6. Check sensors and flags for proper operation.
resetter printer Canon iP1000 Waste Ink Counter Reset Manual for Service mode
Step 1:
1. Turn off the printer. And disconnect the printer cable.
2. Press and hold the POWER button, turn on the printer.
3. The indicator (L.E.D.) should be green.
4. Press and release the RESUME button , the indicator (L.E.D.) should be orange.
5. Press and release the RESUME button again, the indicator (L.E.D.) should be green.
6. Release both buttons.
Step 2 :
Software for Permanant (1st method)
1. Reconnect the USB cable and turn ON your Printer
2. Open "General Tools for iP1000"
Reset Printer Canon iP1700/1300
2. Hold down Resume button and press Power button.
3. Keep holding down Power button and let Resume button go.
4. Press Resume button 2 times then let BOTH buttons go.
5. Green lights will flash and then stop blinking.
6. When green lights are solid, press the Resume button 4 times.
7. Press the Power button and the printer should turn off, if not,
press the Power button once more.
8. Your printer should respond as normal.
Resetting Ink Counter Level on Canon Pixma iP1600
the Stop/ Reset button.
- When the Power is lit, press the Stop/Reset button two times while pressing and holding the Power button.
- When releasing the Power button and the Stop / Reset button (regardless of order), the printer will move into a
service mode. (Waiting for menu selection)
- When the on/off lights in green, press the Stop/Reset button the specified number of time(s) according to the
function listed in the table below.(Each time the Stop/Reset button is pressed, the LED lights alternately in
orange and green, starting with orange.)note: press 4 times for waste ink counter reset.
The number of the Reset button pressing
LED Function Remarks
0 time Green Power off
1 time Orange Service pattern print
2 times Green EEPROM print
3 times Orange EEPROM reset
4 times Green Waste ink counter reset
regards
Owner’s Manual Otterbine Bunker-Pumper

If you get any problems or questions regarding your new pump, please striking your hedged Otterbine distributor or tendency us at 610-965-6018. Your new shoe is a strong well-tested way, but it requires many number fix and fixture. Delight register this recitation before action.Dust cover should be clean after every use. 2. Pump should be greased after every use. A) Use purple man value grease (forthcoming in 14oz pickup from Otterbine, P/N 48-0006). B) Property the tip of the grease gun on the oil trial (Image 3) set on the pumps structure. C) Change with oil until all of the old grease has been pushed out of the match valve(Personage 3) beneath the grease fitting. D) You should see the new (violet) grease come out. Once this has happened, you are done.
download here
TWM Performance Short Shifter Nissan 350Z, 370Z Infiniti G35, G37 Manual
 E'er wreak safely and use a straightlaced ass with at minimal 2 jackass stands. Post the bout move of the stagehand (there testament be a scrap kicking over it which you can movement off) under the car where it connects to the movement rod. Alter trusty the stagehand is busy in 5th wheel and use a 12 mm socket with a ratchet to withdraw the haste retentive the shifter to the alter rod. Put the haste substance for re-installation afterward. download TWM Performance Short Shifter Nissan 350Z, 370Z Infiniti G35, G37 Manual here
Engineering Technical Reference Manual Oracle

This Abstract Extension Manual (TRM) in any change, software or printed matter, contains patented collection of Oracle House; it is provided low an Seer Firm understanding containing restrictions on use and revelation and is also fortified by document, papers, and remaining good commodity law. Restrictions applicative to this TRM let, but are not qualified to: (a) exertion either the homophonic laurels of aid to step the confidentiality of this TRM as you drill to passport the confidentiality of your own most main Confidential Content ora just laurels of charge, whichever is greater; (b) maintaining agreements with your employees and agents that protect the Confidential Information donwnload here
Water pump Workshop Manual 1999 Windstar
 1999 Windstar Wet shoe Workshop Recitation. 1. Disconnect the bombardment ground telegram. For additional aggregation, relate to Division 414-01. 2. Feed the cooling group. For added collection, intend to Chilling Group Debilitating, Fill and Injury. 3. Shift the supplement propulsion sing. For more collection, touch to Division 303-05. 4. Make and connection the container. For more collection, intend to Segment 100-02. 5. Disconnection displace radiator footwear (8286) from the food pump inferior tube.pedagogy panel. For additional content, concern to Cut 501-02. 8. Disconnect the food route hose (8597) and the delivery garment (18472) from the element shoe receptacle structure.Remove the food ticker vent cylinder flee and business the tubing gathering out of the way.Attach engine lifting equipment and increment the engine 127mm (5 inches).Shift the drive whack. 1. Rotate the course tensioner counterclockwise. 2. Press the season crop towards the rap tensioner to confine sing tensioner in localize. you can download here
Thursday, February 3, 2011
HP Laserjet Error Codes 13.14
Replace paper control PCA.
more info here
13.10 PAPER JAM CHECK DUPLEXER
2. Check the duplexer for proper operation.
Replace the duplexer if a sensor is defective.
for more information here
HP Laserjet 4100 series service mode
2 Press the right side of the MENU key, then press SELECT. The message SERVICE MODE temporarily appears and will reappear when the printer completes the initialization process.
3. Press [Menus] once to display SERVICE MENU.
4. Once it says SERVICE MENU press ITEM to scroll through service mode items.
5. To exit the service mode, press GO.
Note: If READY appears in the control panel, the keys might have been released too soon, or the wrong keys were pressed.
Wednesday, February 2, 2011
HP Laserjet 4000 and 4050 series service mode
1 Hold down [Select] and [Cancel Job] while turning on the printer until all of the lights on the Control Panel are lit. (If the Control Panel reads INITIALIZING, the keys were released too soon.)
2 Press the right side of the [Menu] key, then press [Select]. The message SERVICE MODE is displayed.
3. Press [Menus] once to display SERVICE MENU.
4. Once it says SERVICE MENU press ITEM to scroll through service mode items.
5. To exit the Service Mode press [Go].
Service Epson R270
If You want to service epson R270 using Adjustment Program Epson R270 don’t forget to change date setting in your computer to 18 January 2008. This setting is used to run adjustment program R270 without error. Procedure using this adjustment program like using adjustment program for epson C58, C79 or C90 (can be seen here)
If you want to reset Epson R270 using SSC Service utility, there no setting must be altered. You is only have to compare to SSC service utility setting with your printer. Procedure to use this software look here.
Resetting Waste Ink Counter Printer Canon Pixma iP 1880
A. Reset Manual.
On reset manual, sometime printer return blinking after turn on again. For reset manual following its way :
* Turn the printer on
* Press and hold Resume button for 1-2 minutes
* Open the printer cover
* Release the catridge and then put catridge again
* Close The Cover
* Turn Off then Turn On again.
B. Using GeneralTool for canon pixma ip 1800 series
Before using GeneralTool for canon pixma ip 1800, printer driver should have been install correcly in the computer.
Using GeneralTool iP 1800...? why do not use GeneralTool iP 1880. Canon Pixma iP 1880 is canon iP 1800 series. Follow this intruction to reset the printer :
* Download software resetter for canon pixma iP1880 from Here
* Before connecting printer to the power suply, press and hold power button then connecting the printer to the power.
* dsacme.blogspot.com
* While hold the power button press reject button for 2 times then release power button.
* Run general tool for canon iP 1880. After the printer know, Click lock release button. ( note : to view locK release menu, min resolution 1024 x 728).
* Then select Set Destination to iP1800 (my canon iP 1880 printer is iP1800ASA)
* Click MAIN and PLATEN button to reset waste ink counter to zero.
* Finally test print by click TEST PATTERN button.
C. Using iPTool software
This is software from Rusia for canon iP series. Using this software give separate experience. this software detect automatically attached printer in the computer. following way reset to use iPTool software :
* Download and ektrak iPtool software, you can download the software from this url :
* Turn on the printer
* Then run iptool software, the software will detect the printer automatically.
* To reset waste ink counter to zero click “Reset Main” and “Reset Platen” button.
* To view the result do test print.
Tuesday, February 1, 2011
Download HP Business Inkjet 1000 Drivers
If you have connected the USB cable to your printer and turned on the printer, do not turn off the printer or unplug the cable from the printer when the printer setup program is running. If you do so, the setup program will not go to completion.
Unable to create printer using setup program after Plug-and-Play installation on Windows systems
The printer setup program may fail to detect the printer if it has already been installed using Plug-and-Play without going through the setup program. The setup program will not go to completion.
To resolve this, select the Cancel button to exit from the setup program, then run the setup program again and select an unused port.
If you just wish to install other components (such as Toolbox or user’s guide), choose not to install the driver when running the setup program.
Unable to continue printer software installation without physically connecting printer
If you wish to install the printer by going through a direct connection using a USB cable, you must physically connect the printer to the computer when prompted by the setup program. If you do not connect the printer, the setup program will not go to completion.
If you wish to install the printer software without connecting the printer, select any port (such as a COM port) from the Other Port drop-down list. After installation, associate the printer to a USB port in the printer properties dialog box.
Unable to install printer software using customized installation package
If you plan to create customized installation packages and run it on the PC without the printer connected, please do the following:
· When creating the installation package, select COM port under the Others Option with a list of available ports in the Connector Type dialog.
· Run the installation package on the computer.
· After installing the printer software, connect the printer and change the Port setting to USB.
Note: Ensure that the printer name and the name of the shared printer specified in the customized installation package do not exist on the installation system.
Unable to do Plug-and-Play installation from Windows to Novell
The printer setup program will fail to detect the printer if you try to do a Plug-and-Play installation to a Novell server through a USB port. The setup program will not go to completion.
To resolve this, select any port (such as a COM port) from the Other Port drop-down list. After installation, associate the printer to a USB port in the printer properties dialog box.
Unable to install printer driver using Novell NDPS printer manager on some Windows systems
If you have installed Novell client service pack 3.32sp1 on Windows 98 or 4.83sp1 on Windows 2000 or NT, an error message will appear when you try to install the printer driver using Novell NDPS printer manager.
To resolve this, install the driver using the Add Printer method.
Novell Point-and-Print does not work with Windows 98 and Windows 2000.
Use the Add Printer Wizard to install the printer driver:
1. Go to the Printers folder.
2. Double-click the Add Printer icon.
3. In the Add Printer dialog box, select the Network Print Server option.
4. Browse to the appropriate NDS or bindery queue.
For Windows 98, you can also use the following alternative:
1. Use the HP File Expansion utility on the Starter CD’s \Utils\Expand folder to uncompress the Windows 98 driver to a temporary location on your hard disk.
2. Use the driver in this temporary location to set up Novell Point-and-Print.
Unable to print on Windows 2000 and XP clients after installing (kernel mode) driver from Windows NT 4.0
Users will be prompted for the printer driver when they try to print after installing the (kernel mode) driver from Windows NT 4.0 by doing a point-and-print.
This is because Windows 2000 and Windows XP cannot print using the Windows NT 4.0 kernel mode driver.
To resolve this, administrators need to install the user mode driver for Windows 2000 and Windows XP on the Windows NT 4.0 server.
To install Windows 2000 and Windows XP user mode driver on Windows NT 4.0 server:
1. In the driver properties dialog box on the server, click the New Driver button on the General tab.
2. When prompted for files, locate the Windows 2000 and Windows XP folder on the printer Starter CD and select the user mode driver.
Installation through network fails to locate certain files on some Windows systems
If you are installing the printer through the network and the network path that you provided (when prompted) is very long, installation will fail to locate some installation files.
This is a limitation of the operating system. It can support only a limited number of characters in the full path (including filename) that you specify.
Reboot is required after installation on some Windows systems
When prompted, please reboot your system after installation.
Paper-delay jam at paperfeed area
how to solve
1. Ensure that paper trays are loaded and adjusted properly so media can feed from the tray. It might be necessary to reduce the stack height of media in the tray. 2. Check the input area for obstructions such as media in the path. Also check to see if the registration assembly damaged or unseated. 3. Replace any defective sensors or flags. 4. Verify the media meets the specifications. 5. Check the pickup feed and separation rollers for unusual wear. Replace as needed. 6. Rotate the media in the input tray by 180° and/or turn it over
HP Laserjet 4 and 4 plus series service mode
2. Press the [Form Feed] key, then the [Enter] key. The message SERVICE MODE is displayed briefly, then the printer automatically begins a 05 SELF TEST. After several seconds, the ON LINE and FORM FEED lights turn OFF.
(The printer may display 02 WARMING UP if it has not warmed up completely.) After the printer has warmed up and passed the self test, SERVICE MODE is displayed.
3. Press [Menus] once to display SERVICE MENU.
4. Once it says SERVICE MENU press ITEM to scroll through service mode items.
5. To exit the Service Mode press the [On Line] key.